This post will cover several useful links with online tools that can increase your productivity and help you improve your workflow as a designer. Whether it is a compression or image optimization tool or a text editor, these few links can truly be a life saver.
Let’s get started:
Text Fixer
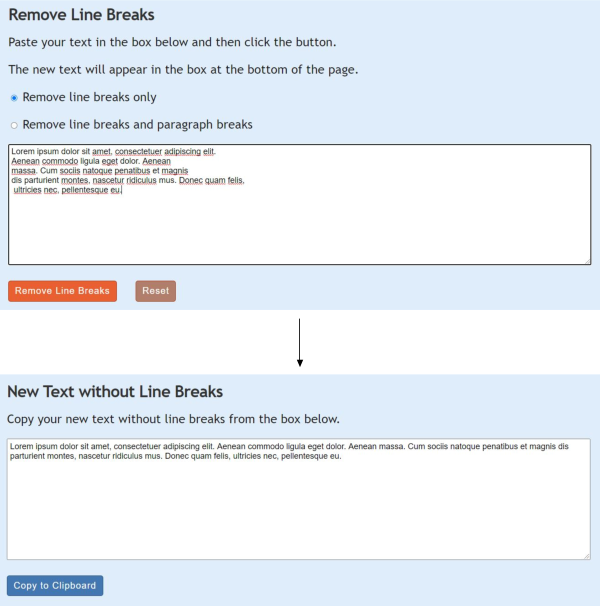
Sometimes when you get a PDF from a client, the text from the PDF might include unwanted line breaks. When you copy and paste this text from PDF into your design, you may see that it is pasted with these line breaks that you would prefer to remove. PDF line break tool enables you to paste this text that contains line breaks and then simply automatically remove them in one click. You don’t have to manually remove these line breaks ever again and PDF line break tool even offers you an option to remove only line breaks and preserve paragraph breaks or remove both of them.
Let’s Enhance
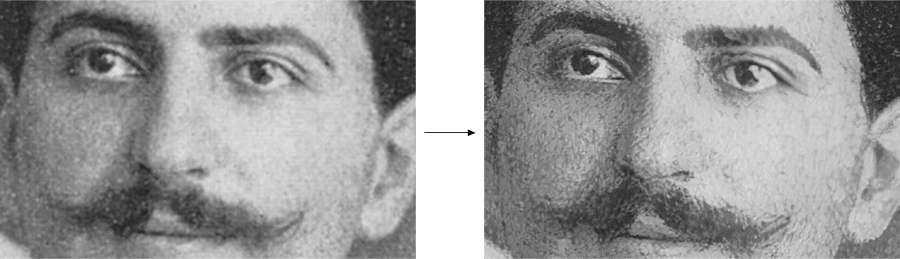
This website can be a life saver when you need to increase the image quality and size. Quickly in a matter of seconds, it allows you to upload a low quality photo and make it larger and improve its quality. With a free account, you can have 5 image enhancements for free. If you want to enhance more images, you can subscribe to some of their paid plans. This has saved my projects so many times when I didn’t have access to better quality photos, so a few dollars are definitely worth it! Let’s Enhance actually does a pretty good job of increasing the picture quality and the resulting photos are very crisp, sharp and ready to use in your project.
Small PDF
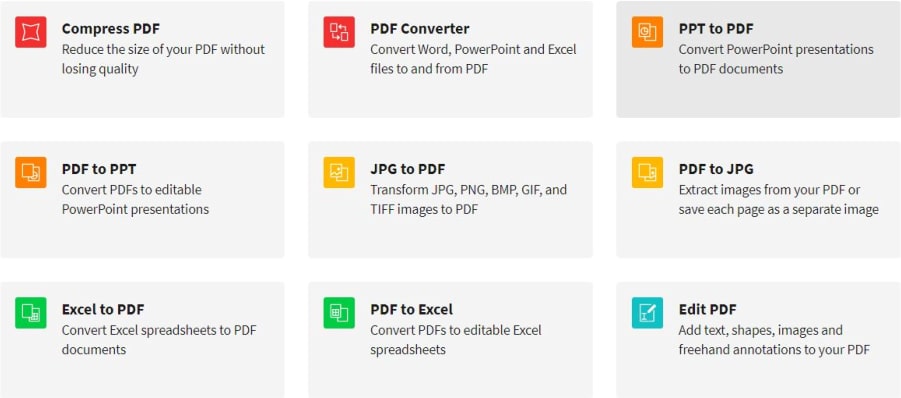
Small PDF is an all-in-one solution for all your PDF struggles. From compressing PDF, merging JPG into PDFs, converting different formats to PDF etc. I use it mostly to reduce the size of the PDF after generating it in a software like Illustrator or InDesign. The compression makes it suitable for email sending, web upload etc. all while keeping a reasonable PDF quality. You can explore all the tools and start with a free or Pro version with a 7 day trial. They offer a Chrome extension as well that you can install for even more convenience.
Compress PNG and JPG
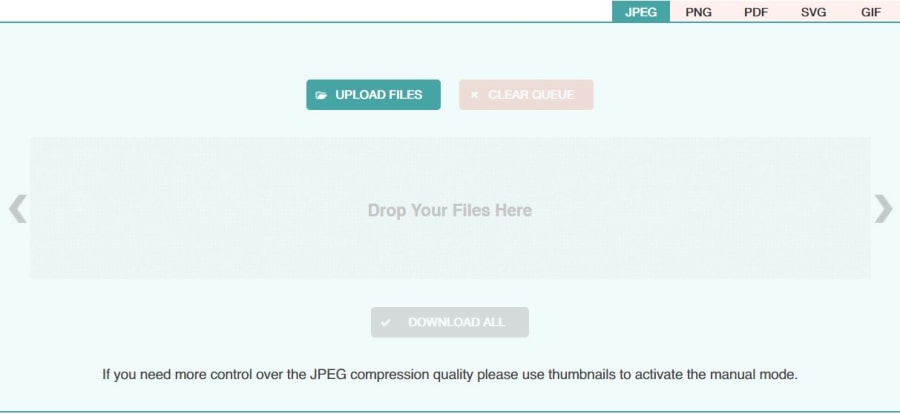
Compress PNG and JPG images quickly online and in bulk. No need to sign up, simply drag and drop your images, wait a few seconds and optimize them without significant quality loss. You can select up to 20 images from your device and download the compressed images either separately or in zip folder. I’ve used this extensively when uploading images online to make sure they are light and don’t slow down the website. Perfect for multiple and bulk image compressions!
Video to GIF converter
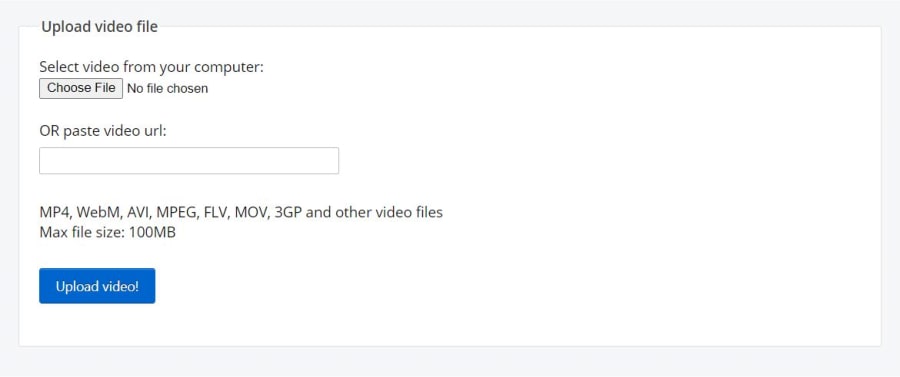
After searching for several online video to GIF converters, I found this one to be most suitable and offering most options, best quality and most flexibility for my needs. You simply select a video from your computer and once it’s uploaded, you can specify the settings for GIF output. You decide which part of the video you want to use to convert to GIF or the whole video, the size and framerate (for up to 10 seconds you can choose 25 FPS). After conversion, you can access to GIF editor, where you can crop, resize, rotate, write, adjust the speed etc. Or simply save it and start sharing it!
Adobe Kuler
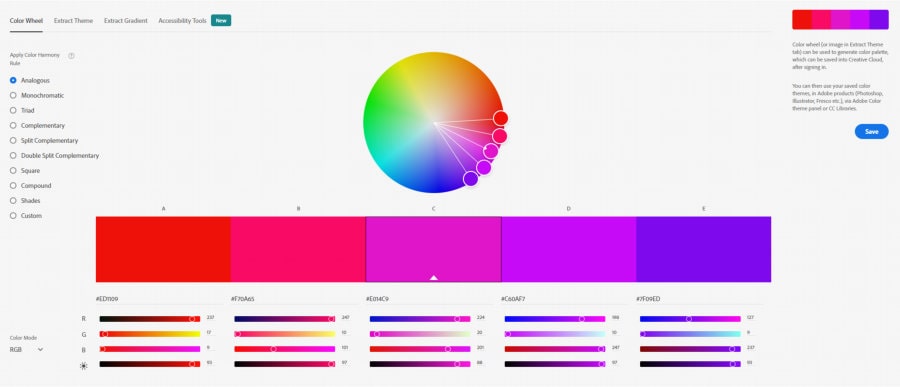
Adobe Kuler is a great tool to pair colors to create unique color schemes. You start with a color you want to use as a base color and find which colors are matching it to create harmonious color palette. It’s algorithm is based on color theory of analogous, monochromatic, complementary, compound colors etc. You can get different codes for the created scheme, from hexa to RGB, CMYK, LAB or HSB to start using them in your design. There is also a possibility to save the created palette to your library or simply browse and explore pre-made library with thousands of already set beautiful color schemes!
Cloud converter
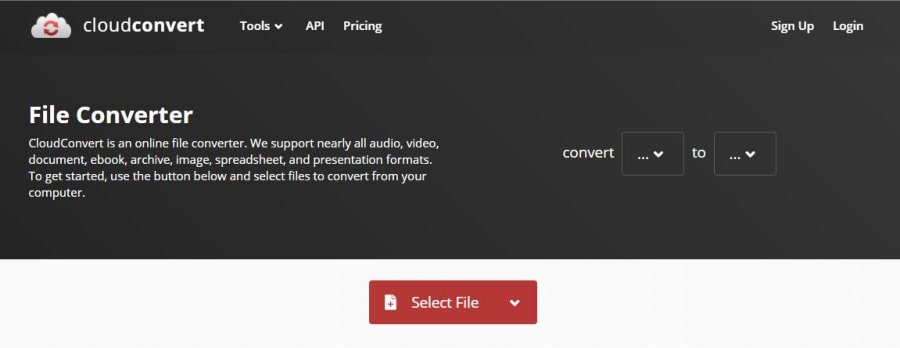
It’s almost impossible to have access to all softwares and to read all the file formats that you might encounter with while designing. This is where Cloud converter jumps in. It supports a bunch of formats, from video, audio to image formats and you can basically convert anything to anything. Let’s say you got an .svg format of a logo that you want to convert to JPG. Or for some reason, the Illustrator file you got from a client isn’t opening, so you would like to see it as a PDF instead. For up to 25 conversions per day, it is free to use. No need to sign in, simply select your file, choose a format to convert it to and download it. For more conversions, you can subscribe to their services charged monthly or per package.
What’s my screen resolution
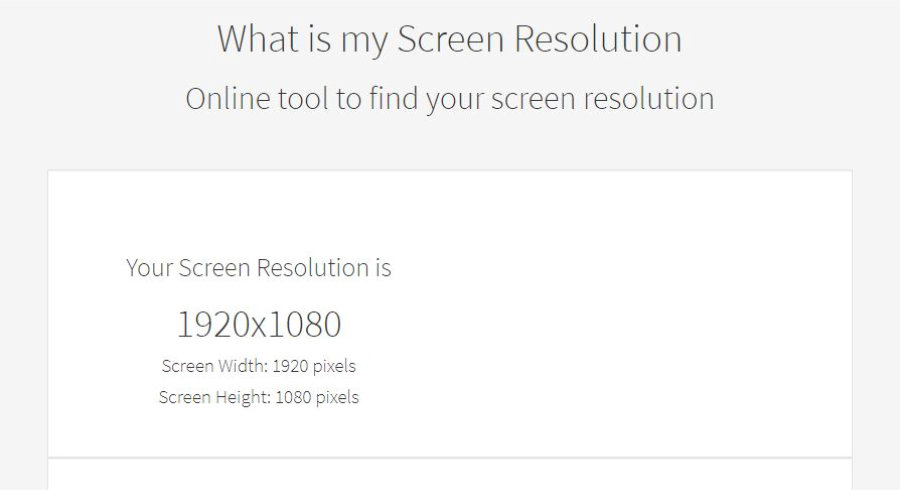
This tool is quite handy for web designers and developers. It does exactly what the name says – it tells you the screen resolution of the device you are currently opening their website on. Simply click on the link above on your desktop, tablet or mobile and see what is the width and height of your screen in pixels.
Convert Case
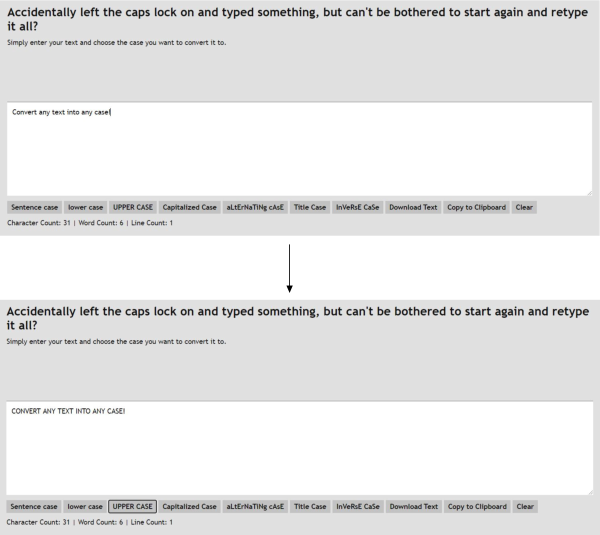
When you don’t want to manually retype the text from all caps to small caps or vice versa, use Convert Case to do this in a single click. Just paste the text in the editor and choose the case to convert it to (for example lower case, upper case, sentence case, capitalized case etc). After that, watch how it gets magically converted in one blink!