Elementor builder is a powerful tool for building websites without a single line of code. Even though it offers a lot of options for building almost anything you want, it relies heavily on plugins that expand its possibilities, design and functionality. These plugins enable you to do additional things that you wouldn’t be otherwise able to do without writing the code. Most of them are very easy to use and setup and require no programing knowledge.
Below you can find a list of best and most essential Elementor plugins for WordPress that you can use for basically ANY website project. I usually start my workflow in WordPress by installing most of the plugins below and I use them in literally every web development project. They improve general functionality, security, speed and SEO so make sure to check them out!
Here we go:
Simple Custom CSS and JS
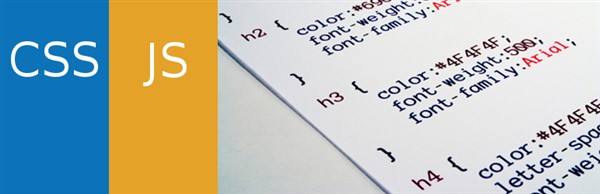
If you are adding custom CSS, HTML or JavaScript code to your website, this is an ideal plugin to do that. Simply install and activate it and start adding the code in the editor. It is super easy to use and no complicated setup is necessary.
Enable Media Replace

Don’t you find it annoying that every time you want to update a photo on your website, you have to first delete it from your WordPress Media Library and then upload a new one? Well, there is a simple solution that enables you to simply replace the media you’ve once uploaded, with the new file. Enable Media Replace plugin does just that.
UpdraftPlus

UpdraftPlus is a very easy to use WordPress plugin that enables you to create backups of your website in seconds. You can backup to cloud or download the files when finished. Backing up your website is essential for restoring the data in case of cyber attacks and hacking, server crashes, complications due to plugin updates etc. Not only that UpdraftPlus backs up your website, it also enables you to restore as well as set automatic backup schedules.
Where to find it in the dashboard once you install and activate it: Settings > UpdraftPlus Backups
Smush

When it comes to boosting your website speed, optimizing images is the key. Smush is one of the most popular plugins for WordPress that gives you an opportunity to bulk compress your image files and reduce their size. It also offers some other options like Lazy Loading that will increase your loading speed and Google Page Speed results.
WP-Optimize

I use WP-Optimize plugin for further speed optimization of my websites. Primarily for cleaning the database after revisions and updates, caching the website and image optimization and compression as well (although I use mainly Smush plugin for that). Caching the website is probably one of the main benefits of this plugin that can significantly reduce loading times. Lastly, another important feature I use within this plugin is CSS file minification. Everything for free and with minimum setup requirements!
WP Performance Score Booster
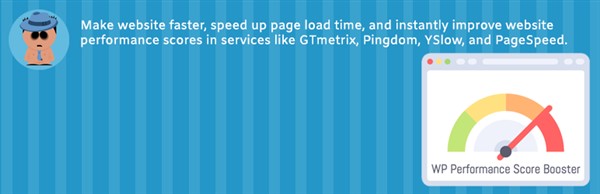
WP Performance Score Booster is another plugin I use to speed up my websites that offers some additional features to improve their performance score. The settings are minimal and you can simply enable removing query strings from static content, text, html, JS, CSS compression, page preload upon hovering before clicking on the links and leverage browser caching.
Where to find it in the dashboard once you install and activate it: Settings > WP Performance Score Booster
Wordfence Security

When it comes to WordPress websites, security is one of the most important questions. There are several ways how to improve security and protect your WordPress websites. Wordfence Security is a must for all my websites and one of the first plugins I install for any WordPress website I am building. It is one of the most important and comprehensive plugins for website protection. Coming with malware scanner and content checking, including scanning comments for suspicious URLs, it sends you regular notifications to your email about the necessary updates and issues on your website. For example, plugin and theme updates, unsuccessful login attempts and security issues and vulnerabilities of your website. It blocks requests from malicious IPs and blocks malicious code and content, as well as limits login attempts.
The other most valuable and commonly used feature of Wordfence is two-factor authentication (2FA). That enables you to additionally secure your WordPress login by adding a second step to your login process. It means that it is not enough only to login using the ID and password, but you will have to submit additional information in order to access your WordPress dashboard. My preferred way to do this is through a code generated by an authenticating app. Once you link this app of your choice to your website using a QR code, the app will create a new code for you every 30 seconds. When you want to access your website, you just use the code generated in real time at the moment you are trying to log in.
Insert Headers and Footers
Insert Headers and Footers is a perfect plugin for non-coders that makes pasting code into your website’s header and footer a piece of cake. This is extremely useful when you want to insert the code for Google Analytics or Facebook Pixel and you don’t want to open and edit complex theme files. Since Google Analytics and tracking of your website traffic is essential, this plugin is a great time saver and a must for almost any website.
Where to find it in the dashboard once you install and activate it: Settings > Insert Headers and Footers
Yoast SEO

With everything going online these days, getting your content and website noticed on Internet is becoming more and more crucial and challenging. Boosting your website’s performance and ranking in search engines is absolutely essential. At the end of the day, how can your audience find you in search engines in this sea of content that’s getting bigger and bigger every day? Yoast SEO is one of the most popular WordPress plugins that helps you manage your SEO and improve ranking on Google and other search engines. It comes with loads of features like automatic SEO improvements, SEO and readability analysis of your written content and the ways to improve it. You can add focus key phrases, meta descriptions of pages and set up how your page looks like when previewed in Google search results. Additionally, you can create XML sitemaps to submit your website’s structure to Google and much more!
Redirection

A very useful plugin when you want to simply redirect a certain page or post to another page or post of your website. Write the URL you would like to redirect from in form of ‘/your-page-on-the-website/’ and then simply instruct the plugin where to redirect that page to. Don’t forget to close the URL with a ‘/’ in order for redirection to work! I’ve struggled with trying to redirect one page to another on my website only to find out all I needed to do is write ‘/blog/’ instead of ‘/blog’.
Where to find it in the dashboard once you install and activate it: Tools > Redirection
Advanced Custom Fields
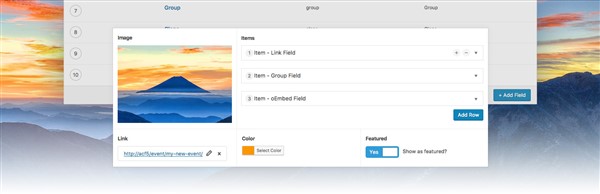
Advanced Custom Fields is one of my favorite plugins to use for blog structured websites. When you are creating a page or a post, sometimes you want to have additional custom fields when you are editing a post, that you want to fill in with information and show on your website. ACF plugin enables you exactly this – to add custom fields to a page or post editing screens. It supports text, image, color fields and much more. For example, you can add a custom field for ‘Year created’, ‘Country of Origin’, ‘Quote’, ‘Hero Image’ or even assign a custom color code to each post and display it as a background for that post. You can simply define these advanced custom fields groups, set the conditions and where you would like them displayed and start filling them in for each page or post separately!