Best Google Chrome extensions for designers to improve their workflow

Having a few Chrome extensions installed in your browser can significantly improve your workflow as a designer. Whether you are just learning about design or want to make your work for clients more efficient and faster, here are a few plugins that I consider a must have and that I use daily. The best part? They are completely free.

WhatFont

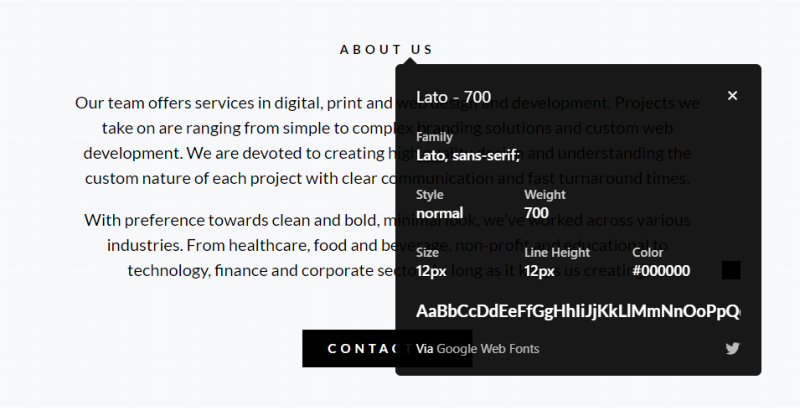
Have you ever browsed a webpage and liked a font you were seeing, asking yourself what typeface and size it is? WhatFont extension enables you to see just that. Once you add this extension to Chrome, you just need to click on it and click on the text on any webpage to see information about the font – such as typeface, weight, size, line height and color. It is extremely helpful to web designers in order to see how different font properties look like in real online environment. Or simply if you liked the font you saw and you want to find out about it and use it in your projects.

ColorZilla

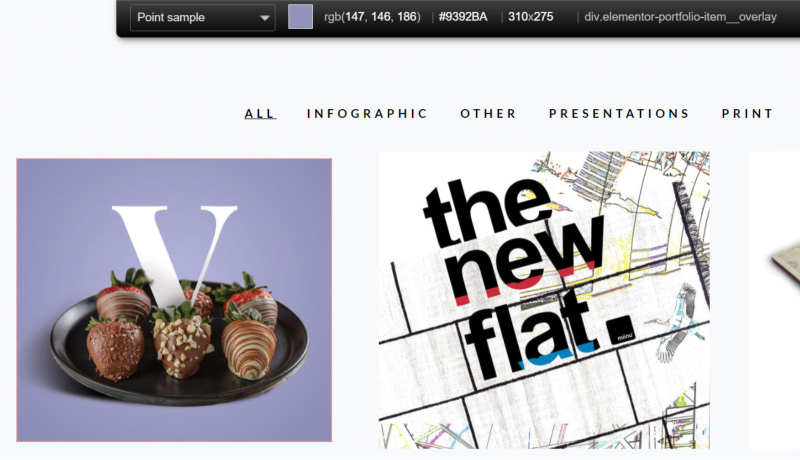
ColorZilla is another useful extension with a color picker that gives you the opportunity to see the color code of basically any color you see on any webpage. You can sample colors from images, colored blocks or even text that appear on websites you visit.

GoFullPage

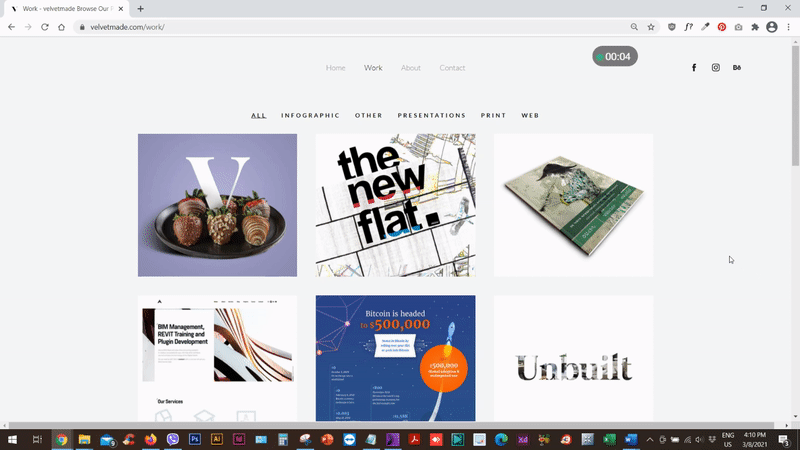
GoFullPage is an extension for taking screenshots of the entire webpage you are currently visiting. Meaning not only the viewport, but the webpage at its entire length. You can then save the image as JPG or PDF.

Vaam

Vaam is a screen recording extension that enables you to send video messages with screen recording and your face recording (or without it). Just enable or disable the camera and microphone. When you’re done, there is no need to download and upload the video. That means simply send it from your browser, where you get the link that you can share with your collaborators, clients or students!

Share this post:

Leave a Comment

Related posts:

General instructions:

  1. Open the exercise in your browser and read the task and the content on the left side of the screen. 
  2. You will be editing the content on the right side of the screen.
  3. In order to do that, right click on the exercise page that you opened and go to ‘Inspect’.
  4. Go to ‘Sources’ in the top bar and if you cannot see an empty CSS sheet where you can type the code, press Ctrl + P and start typing ‘styl’ in the search bar. Then press enter to open the CSS sheet.
  5. Follow the notes on the left and start typing your CSS code to see the changes online!
  6. Important! Do not refresh the page while you are editing the code, as these changes are in preview mode only and you can see them immediately, as soon as you write a line of functioning code.
  7. Use the custom classes in the notes on the left side of the screen, as well as ‘Elements’ on the top bar of the ‘Inspect’ to target and style the classes and elements. For example, you can enable the small icon on the top left of the ‘Inspect’ window (‘Select an element in the page to inspect it’) to find the default class name of the element you want to edit, while you are in the ‘Elements’ tab.

Tips:

  1. If the code is not showing any changes, try adding the !important tag at the end of the line before closing it (before the “;” symbol) and see if it works then.
  2. Don’t forget there are usually more ways to achieve the same result. Be creative!
  3. If you get stuck, write your email address in the form on the left side of the screen and you will get the solution (CSS code) in your email.

Sources:

  1. You can find a lot of tutorials on my youtube channel. 
  2. Watch the tutorial on how to solve these exercises here.

Please check your email and stay tuned for updates on the course.

We will notify you shortly when it’s available for presale.