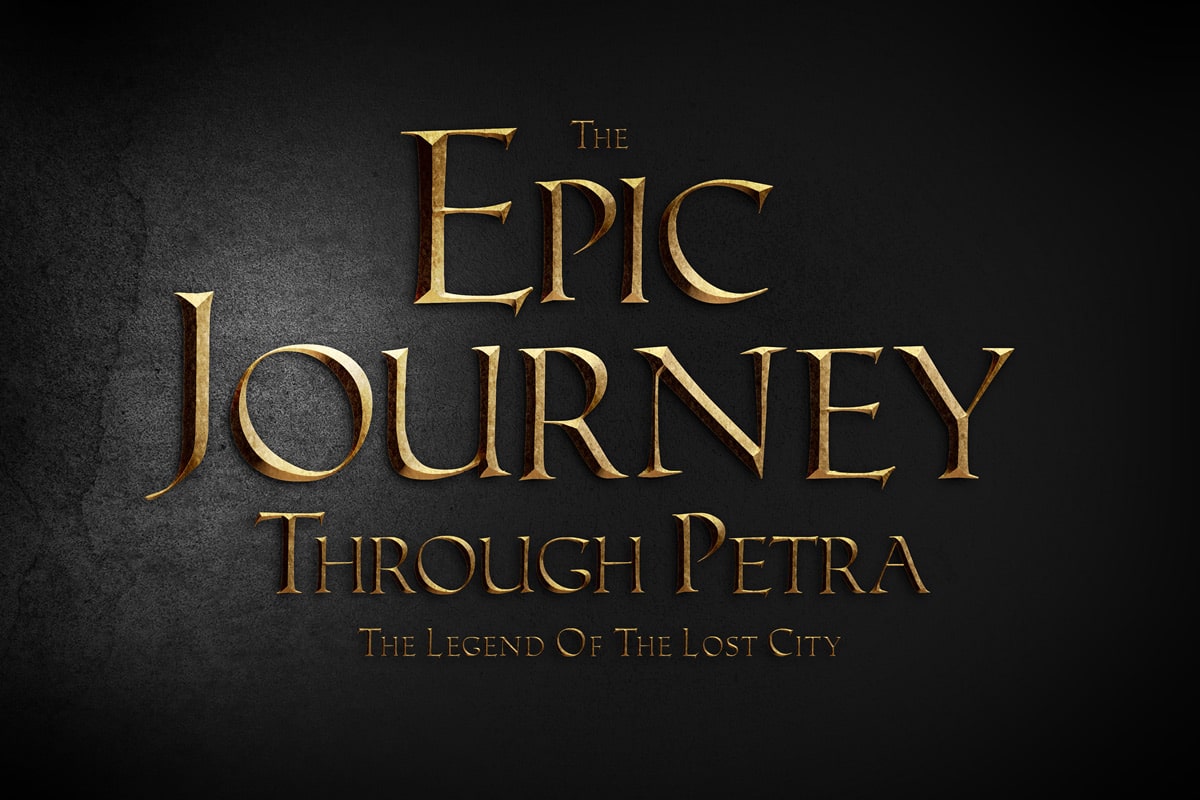
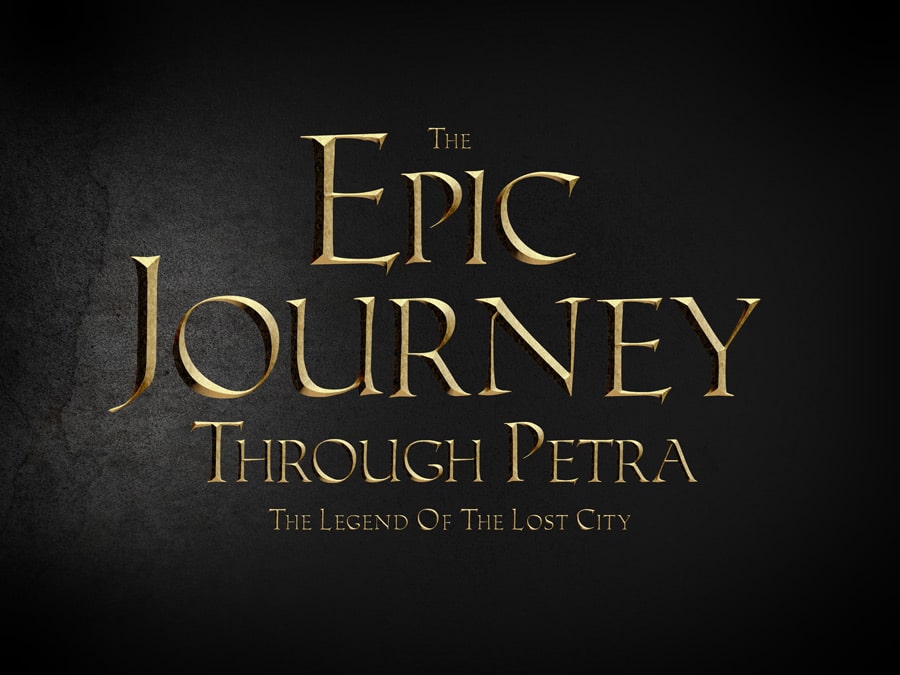
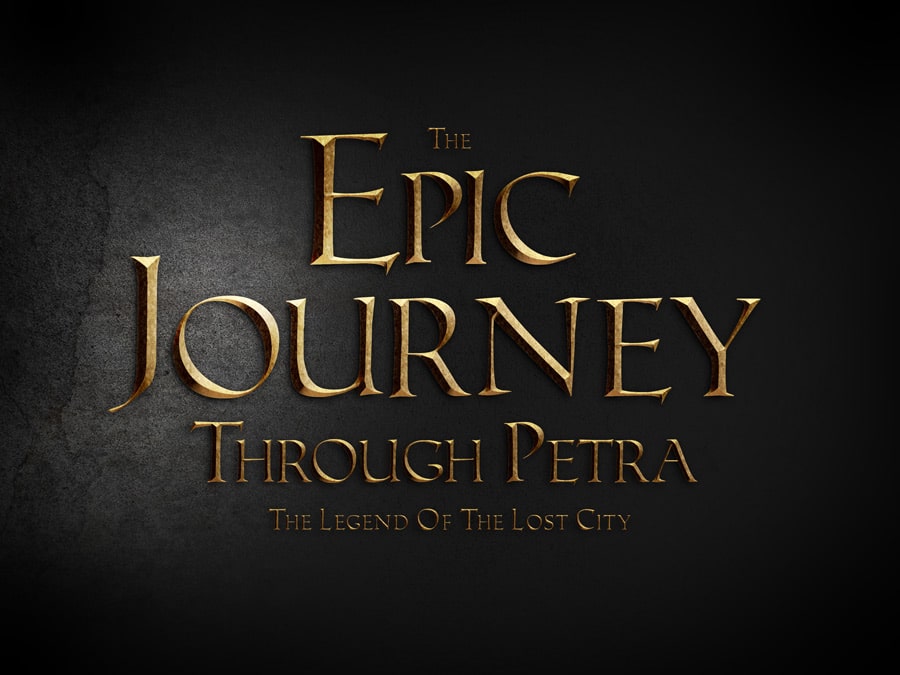
In this tutorial, I will show you how to create this cool metallic 3D text effect in Photoshop. It gives your text a cinematic look, perfect for imitating movie titles (like Harry Potter, Lord of the Rings, historical or epic / fantasy movies) or video game intro scenes.
This PSD effect is available in my store on Creative Market. So if you don’t want to do it yourself, you can go ahead and grab the full effect preset here.
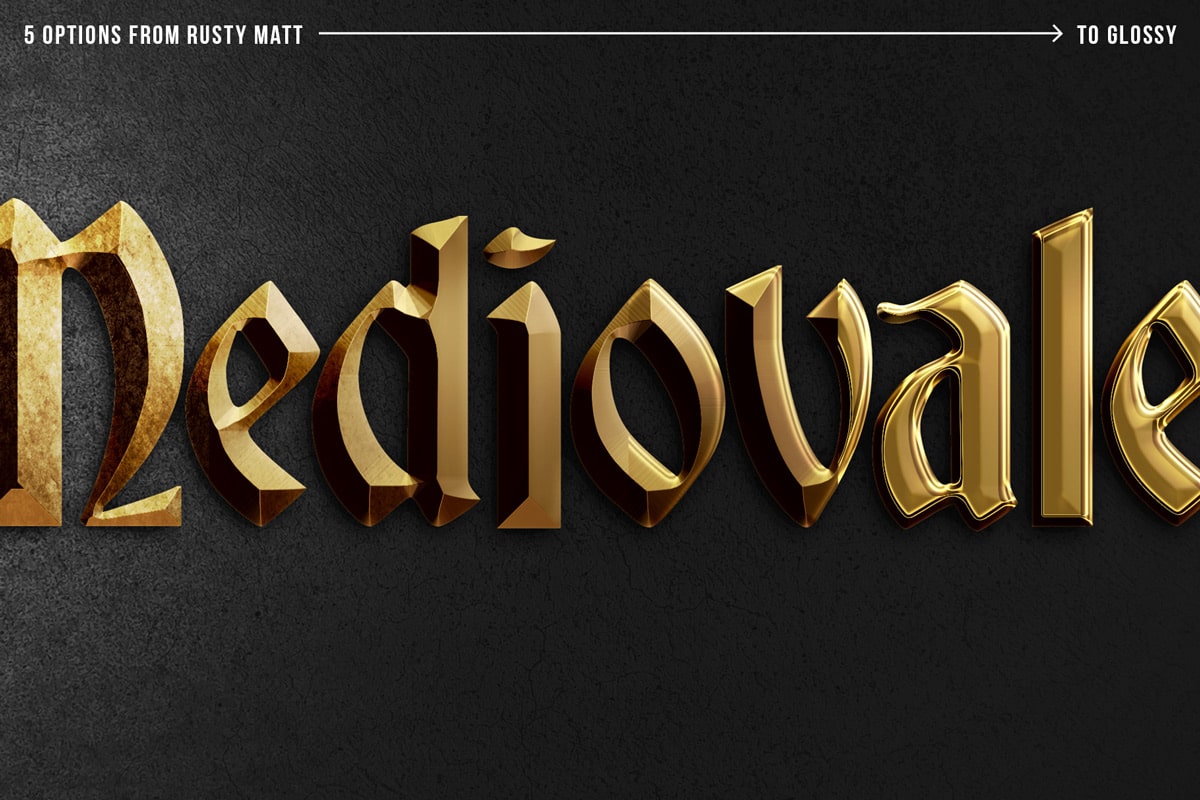
The Photoshop file comes with 5 different presets, from rusty, grunge metal texture to shiny, glossy, polished metal. Several backgrounds are included and gold, silver and copper colors to choose from, as well as few cool recommended free fonts.
Now, let’s see how to create this cool metallic 3D text effect with shadows!
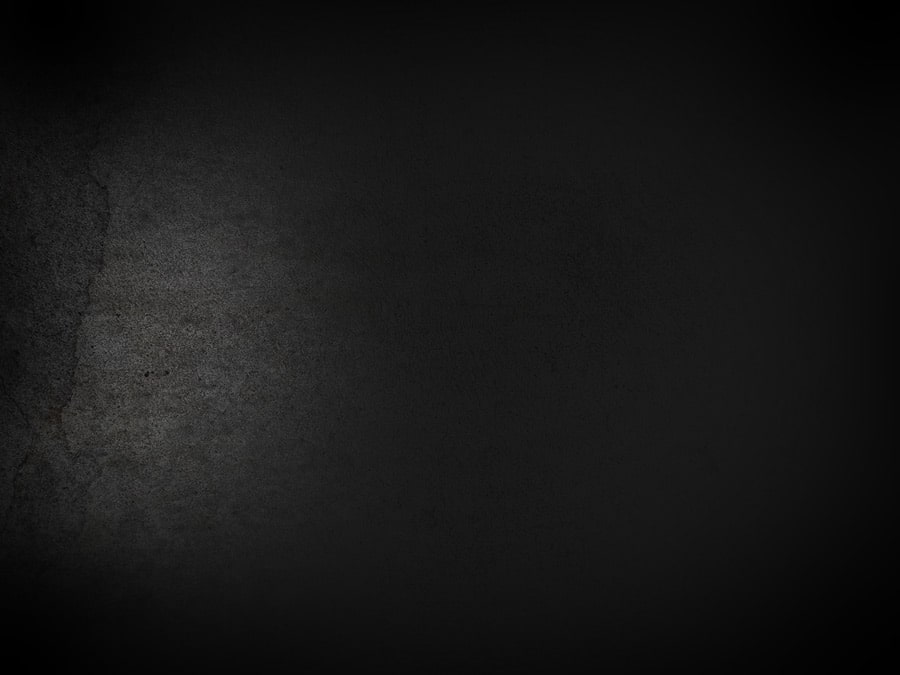
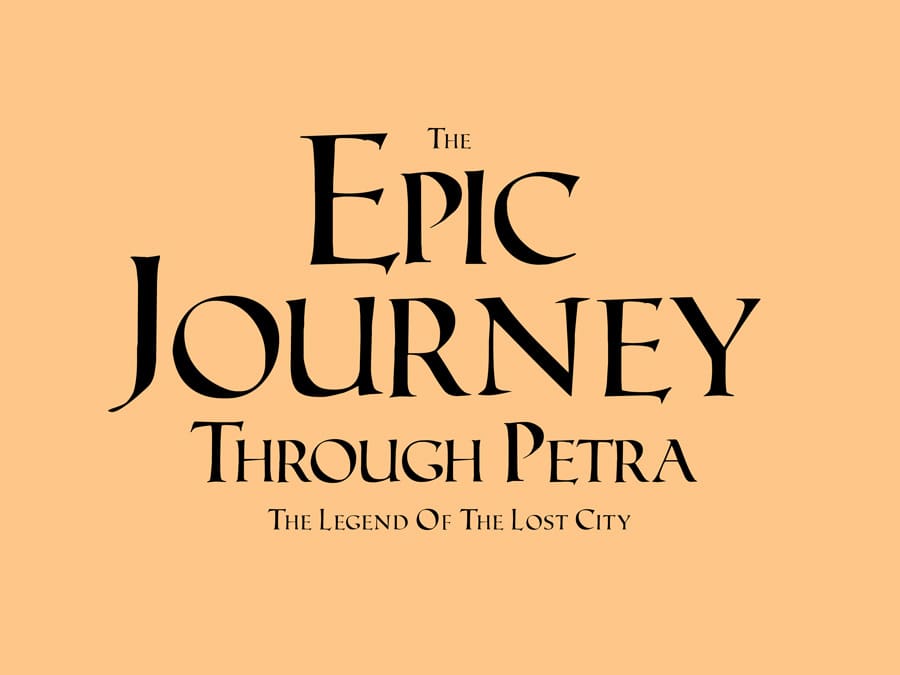
Start by using a dark background and adding some placeholder text
I suggest using a dark background to begin with. I used one of my own old wall photos, gave it a dark overlay and vignette and boosted the contrast a bit.
Then, time to add some text.
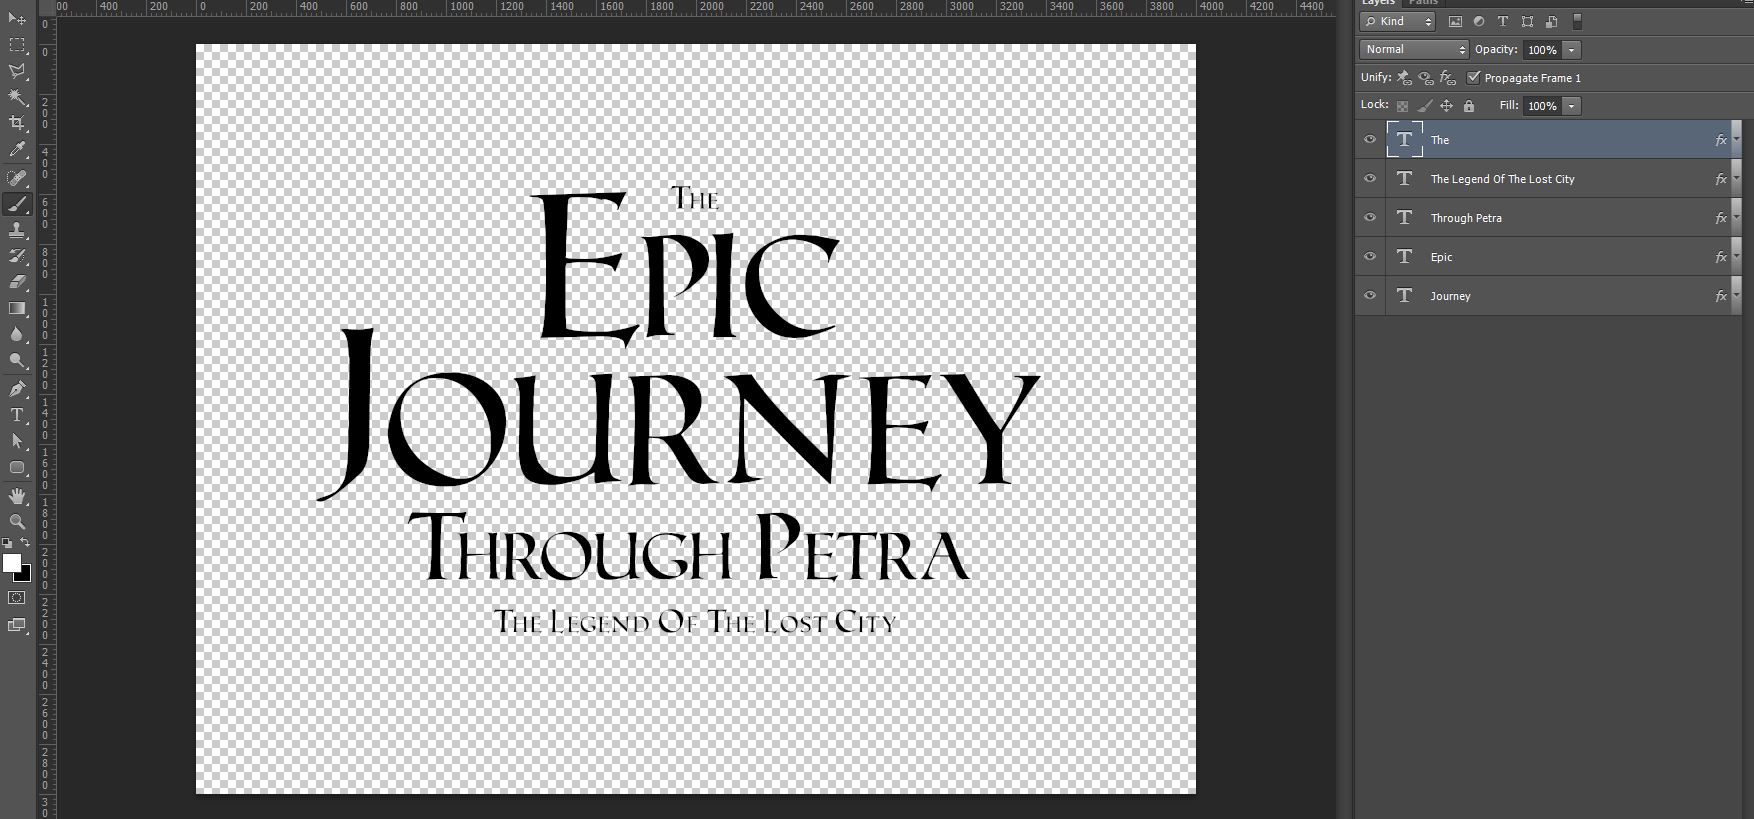
Now, for the text, what I always prefer to do is create a smart object that will hold this text (or any other graphics) inside of it. That way, I can make any changes inside that object, add multiple text frames, add lines, frames and other graphics and this effect will automatically apply to all the elements inside that smart object.
How to do that?
Simply start by creating a rectangle with a size of your canvas. I am using a 4000x3200px canvas, so that will be the size of my rectangle. This is just to ensure we have a placeholder frame for our text to hold the composition size.
Then I will create a text box on top of this rectangle and type something there. For the font, I am using ‘Roman SD’ font. Make sure to make the text big enough to fit on your screen, resize it and reposition it as you want. You can use multiple text frames and add as many text lines as you need. Remember that you can always change the text, fonts, size and everything later!
Finally select BOTH the rectangle and the text layers, right click and go to ‘Convert to Smart Object’. Next, open that smart object by double clicking on it (more precisely on the layer icon) and once you are inside the smart object, simply delete the background rectangle you created. This will make sure you have the text on transparent background, but it will keep the composition size you defined.
That’s it! Now you have a smart object layer containing your text that you can easily edit while keeping all the effects and adjustments we will do in a minute completely editable.
Start adding the layer styles to the smart object layer
All the effects we will be adding will actually be layer styles of this smart object.
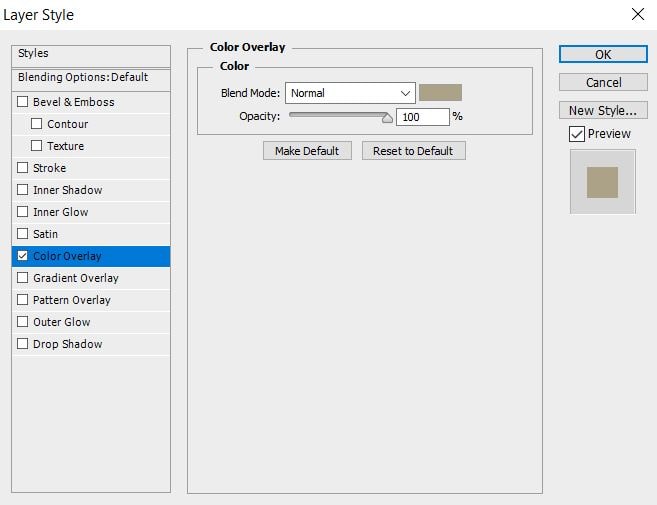
Go back to your original PSD file / window and double click the smart object layer to open its layer styles. Then click on ‘Color overlay’. Add a color of your liking. I am using kind of a faded yellowish / golden color / light brown color (hex #aca288).
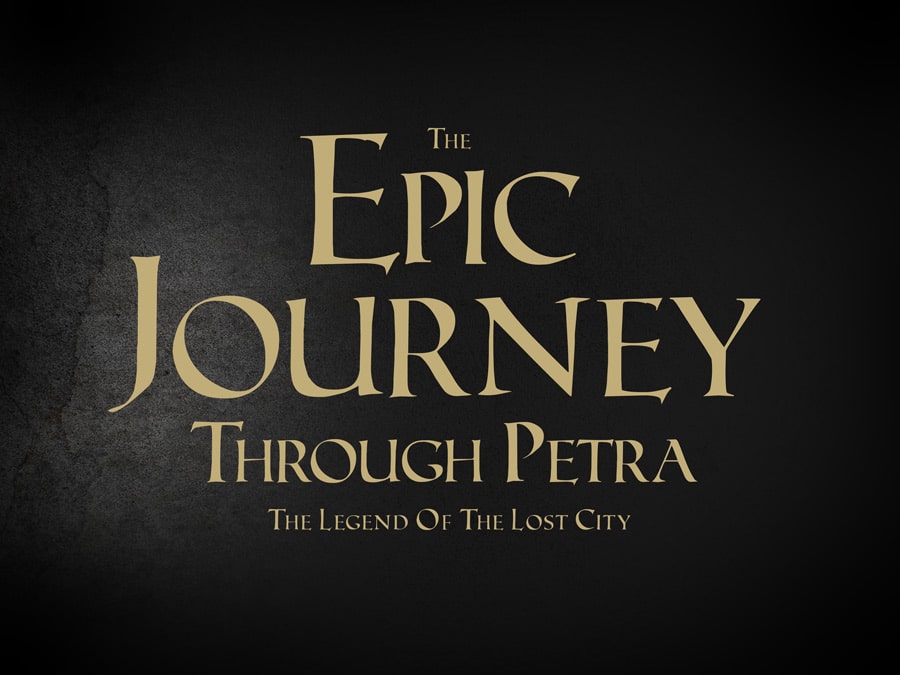
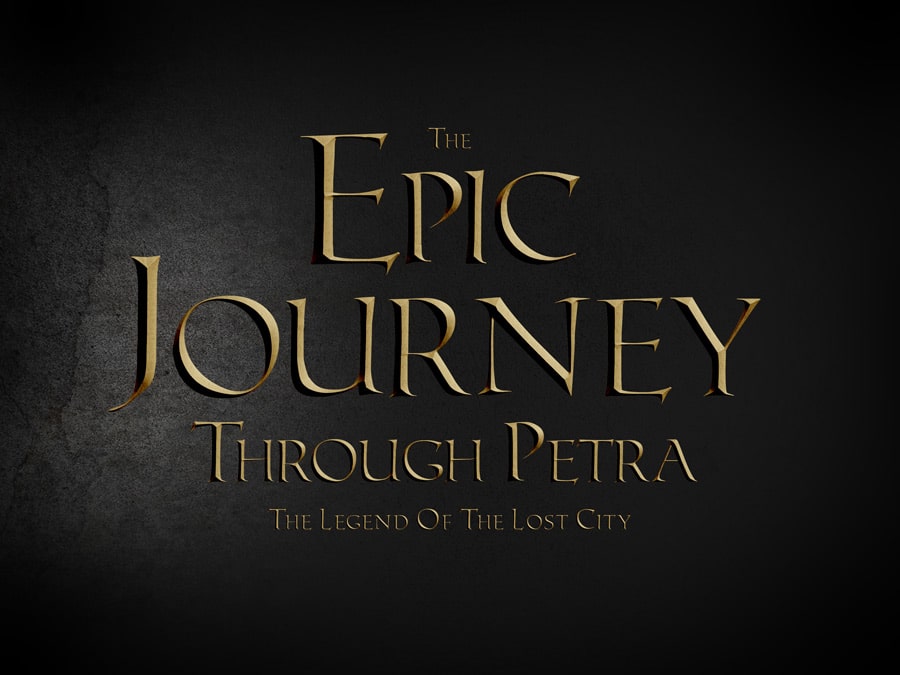
This is how our text currently looks like:
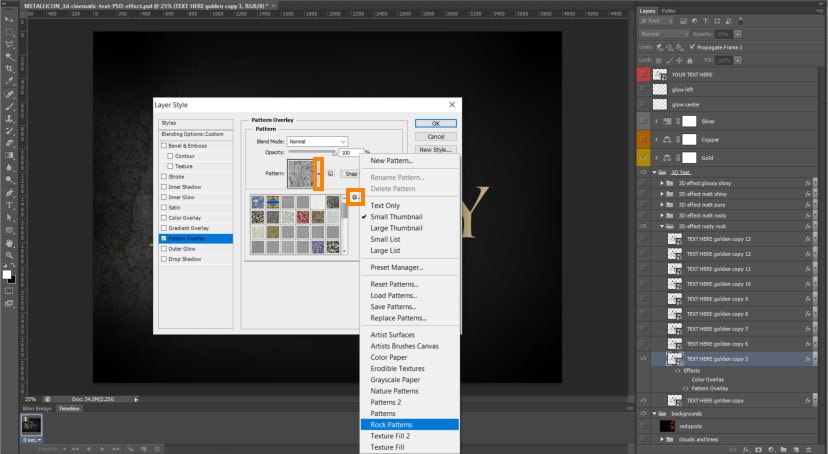
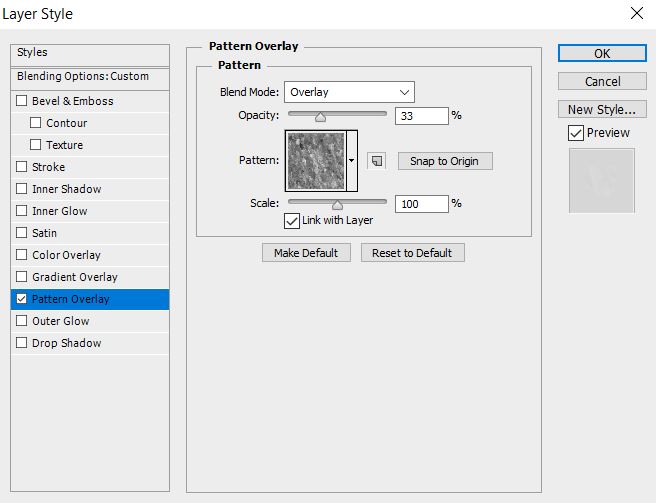
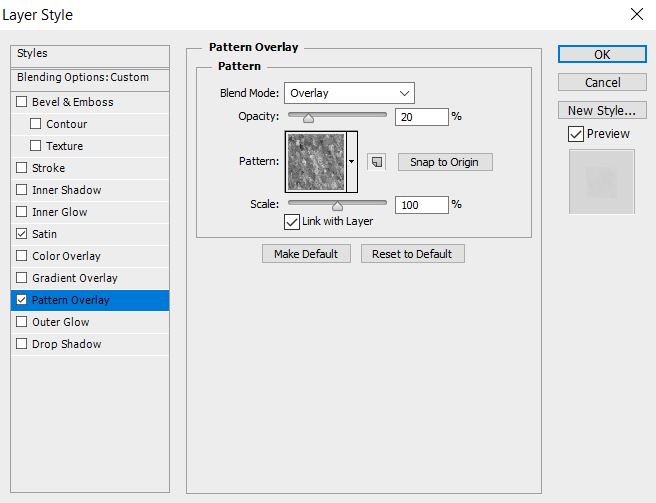
Next, copy this smart object layer by using ctrl+J and double click on it again. Turn off the color overlay and add the ‘Pattern overlay’ and choose a texture. Find the pattern you like (A TIP: click on the gears icon and browse the pattern categories until you find a pattern you want to use). Adjust the scale and click ‘Ok’. Then reduce the opacity of this layer.

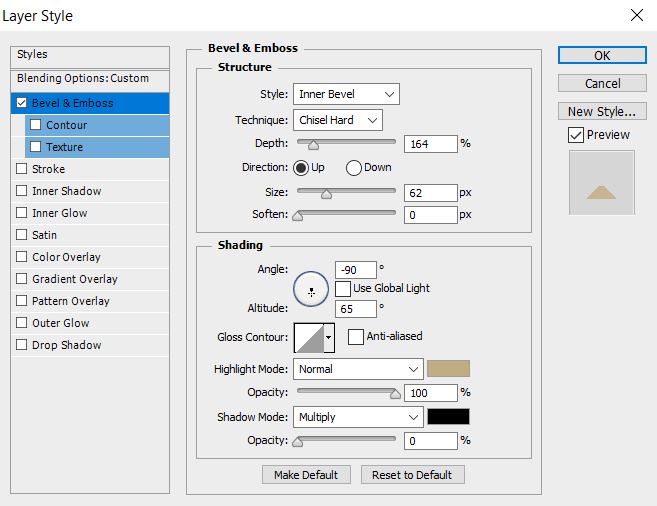
Adding the bevel and emboss layer styles to the smart object
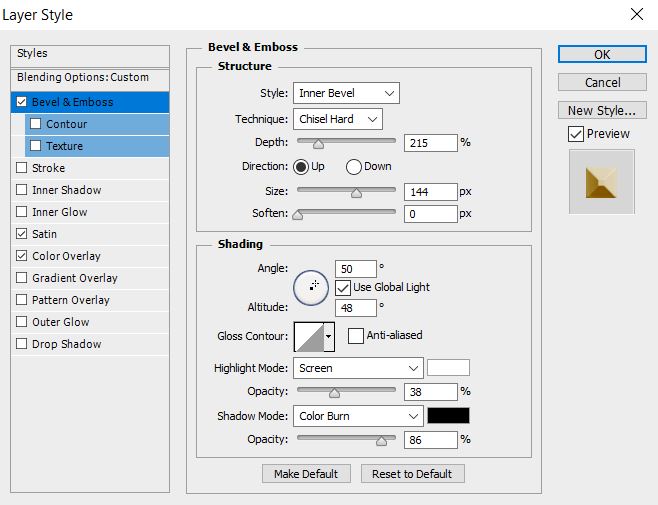
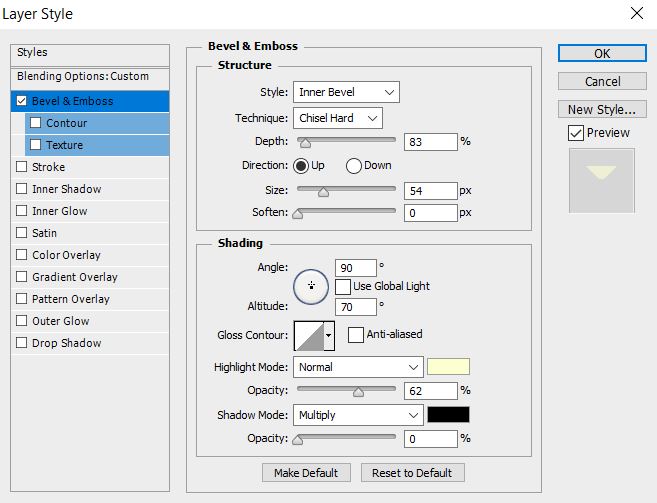
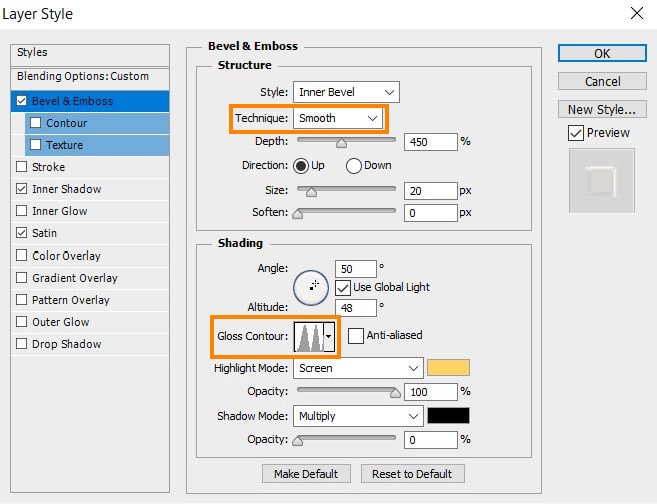
Now the actual 3D effect layering starts. Duplicate the previous smart object layer again and remove the ‘pattern’ layer style. First, add the ‘Bevel and Emboss’. I am using inner bevel, chisel hard and the rest of the settings as in the screenshot below. You can experiment with the light angle, opacity, depth and size until you reach the effect you like.
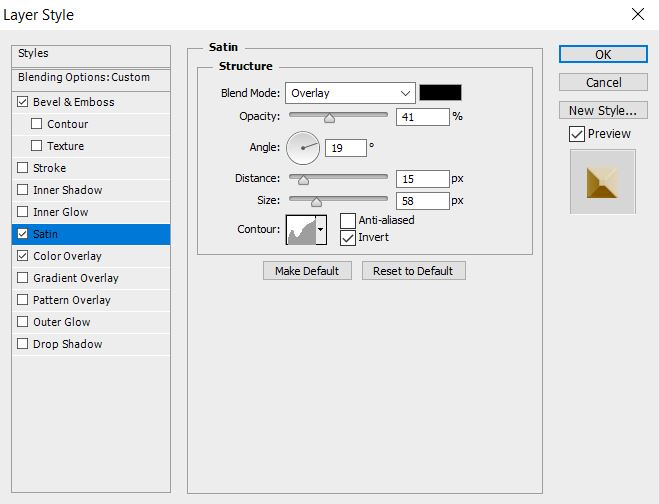
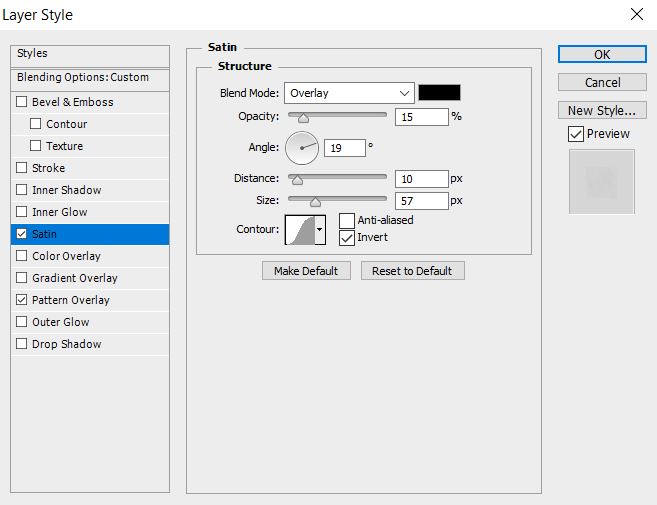
Then, I will add the ‘Satin’ effect to this same layer using the settings below. NOTE: you can experiment with different Contour profiles and you can get completely different results!
Lastly, I will add ‘Color overlay’.
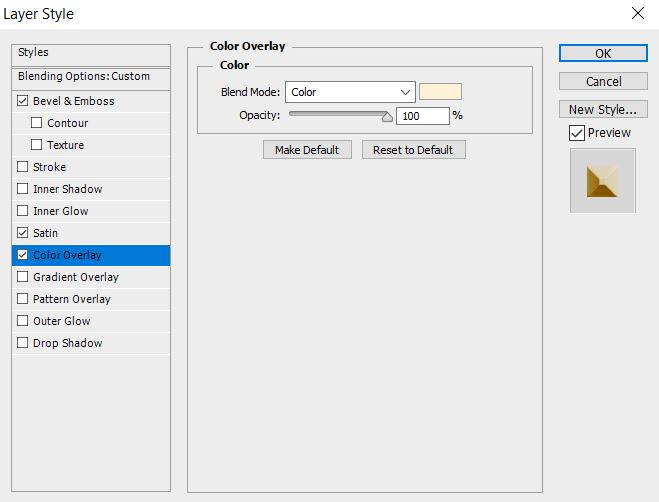
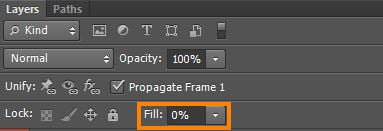
Once you are done, click ‘Ok’ and IMPORTANT: set the ‘Fill’ of this layer to 0%. This will make sure that these effects apply as an overlay to the layers underneath while keeping the text color we set previously to those layers.
Here is the current look:
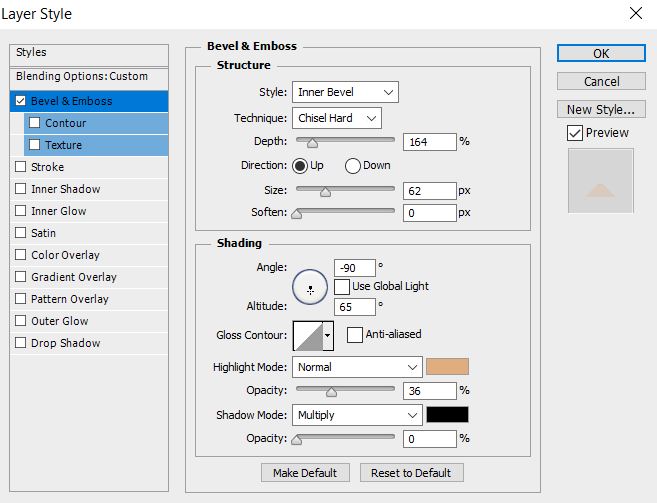
Duplicate the bevel and emboss layer styles
Now is the refining stage. What we are doing basically is just duplicating these layers and changing the layer styles a bit. You can play with light, angles, depth, contour profiles, size until you achieve the look you like.
I will start by duplicating the last layer and applying this ‘Bevel and Emboss’ style:
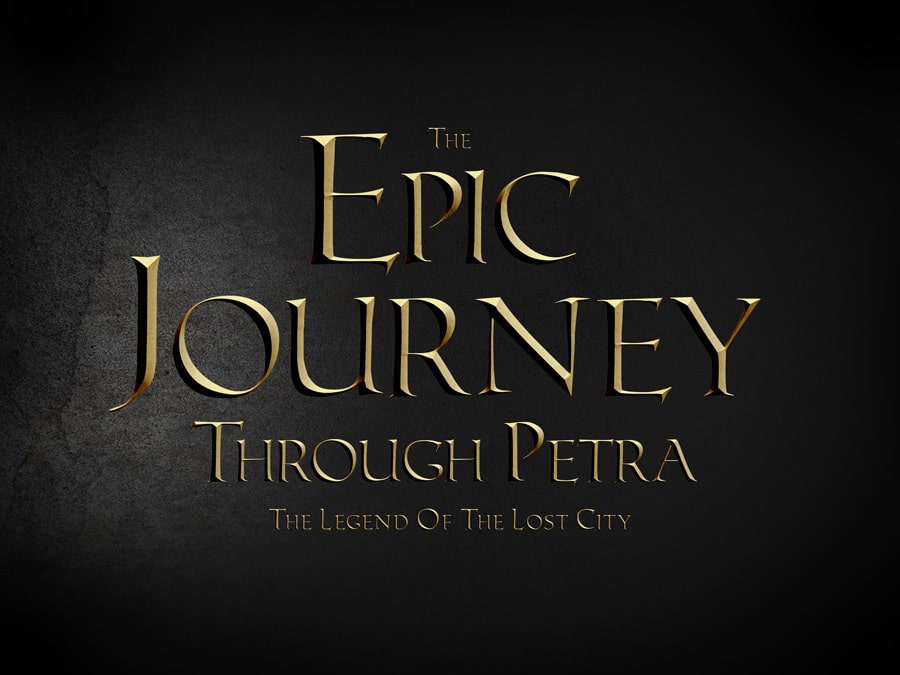
This is how our text looks like with this Bevel and Emboss effect:
Then, I will duplicate the smart object layer again and apply another ‘Pattern’ style to add a little bit more texture and grunge, rusty look to it.

Again, don’t forget to keep the ‘Fill’ of these layers to 0% to see the effect as an overlay and keep the bottom layers!
Then I’ll add another smart object layer with another ‘Pattern’ style.
Next, let’s add a few more layers with different ‘Bevel and Emboss’ effect that will add a bit more depth and throw some light and shaping from below as well.
Let’s see our current state of the text:
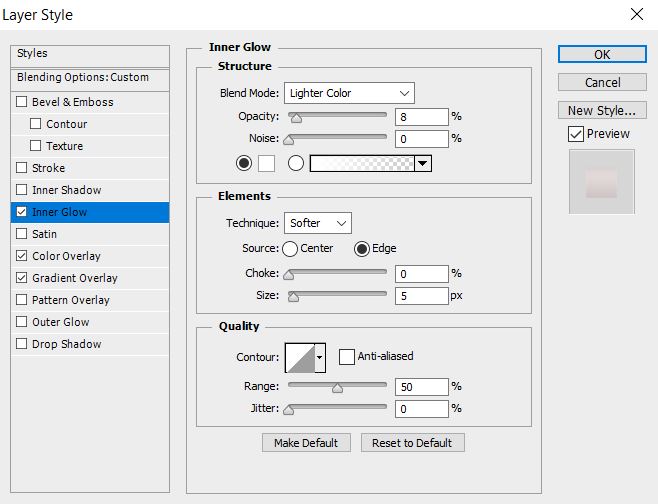
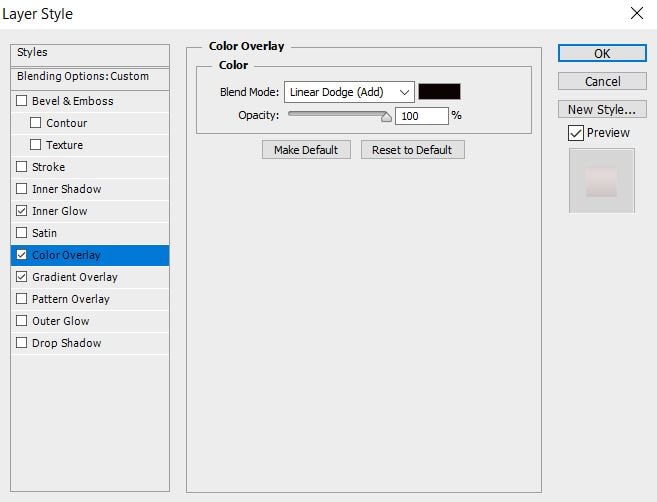
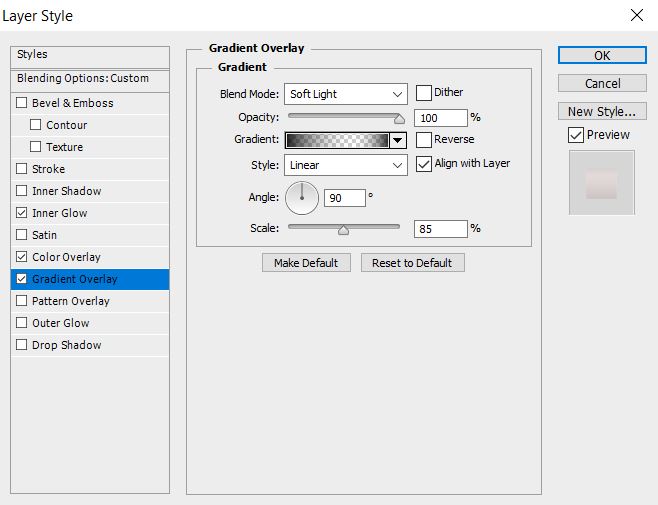
Let’s add a few final refinements. I will duplicate the layer again and add some Inner Glow, Gradient and Color overlay as below:
The last layer will add a bit more pattern and another ‘Satin’ effect.
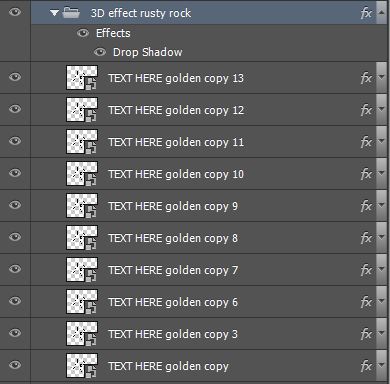
At the very end as a final touch, I will group all the smart object layers into a folder and apply a subtle ‘Drop shadow’ layer style to it.

And that’s it! You can play with different settings but we got our basic rusty cool metallic 3D text effect with almost stone / rock like texture.
You can play with different bevel and emboss settings and remove the pattern layers to achieve more liquid and shiny, glossy metal surfaces like below:
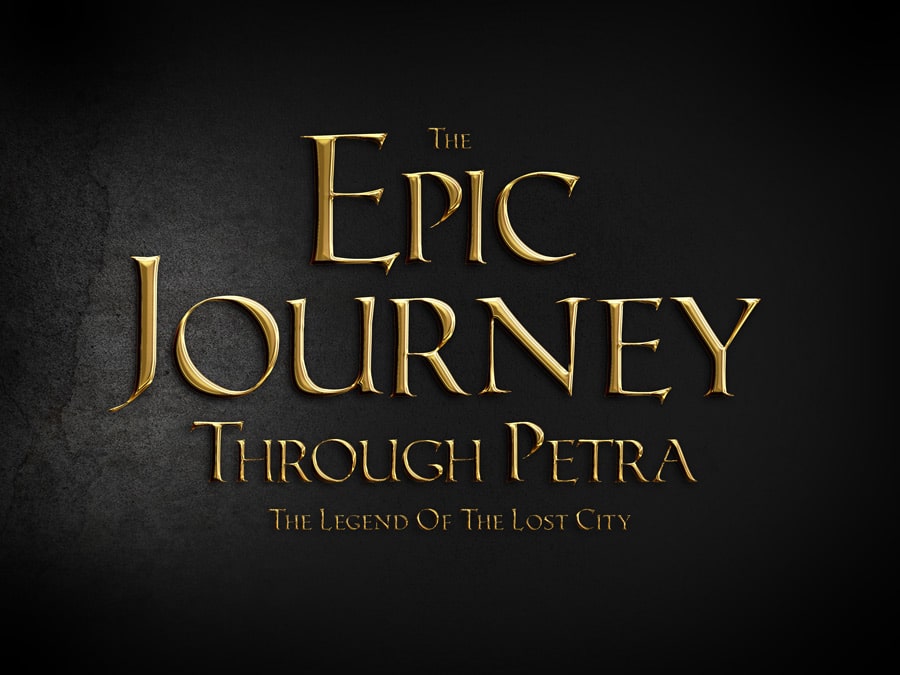
This one imitates gold effect, but using Hue and Saturation filters, you can achieve the same effect in silver or copper colors!