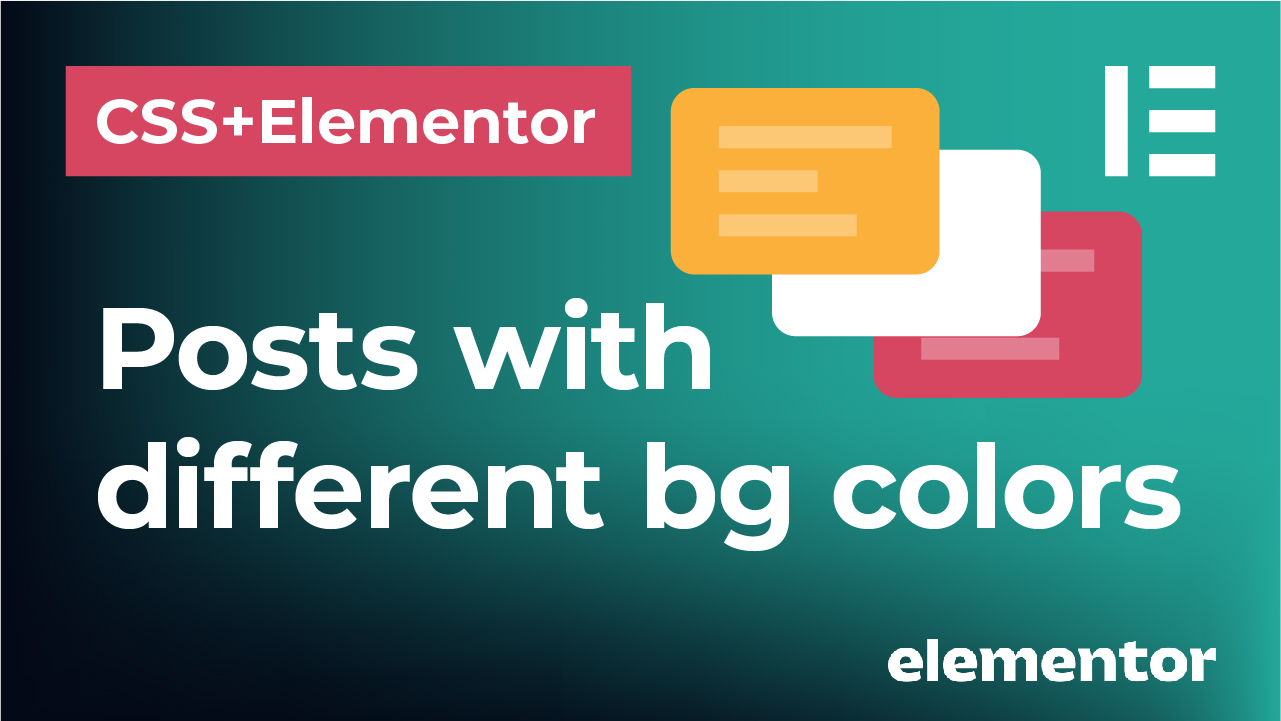
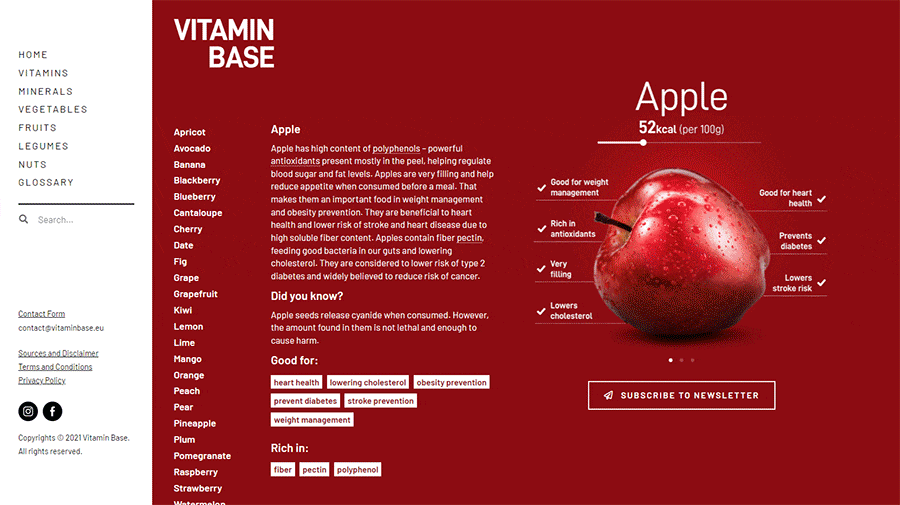
This post will teach you how to create posts with different, custom background colors using Elementor PRO and Advanced Custom Fields plugin. This way, each post will have its own, individual, unique background color. All while following the same post template. Something like on my website https://vitaminbase.eu/ (see the GIF below):
Check this video on how to create just that or continue reading below!
Note that this option is available with Elementor Pro version using Theme Builder and Dynamic Tags.

*This post may contain affiliate links. If you click on a link and make a purchase, I will receive a commission from the sale, with no extra cost to you. That way you are supporting my blog and allowing me to keep making videos and posts like this. I only promote products that I use, have experience with and support, such as Elementor Pro.
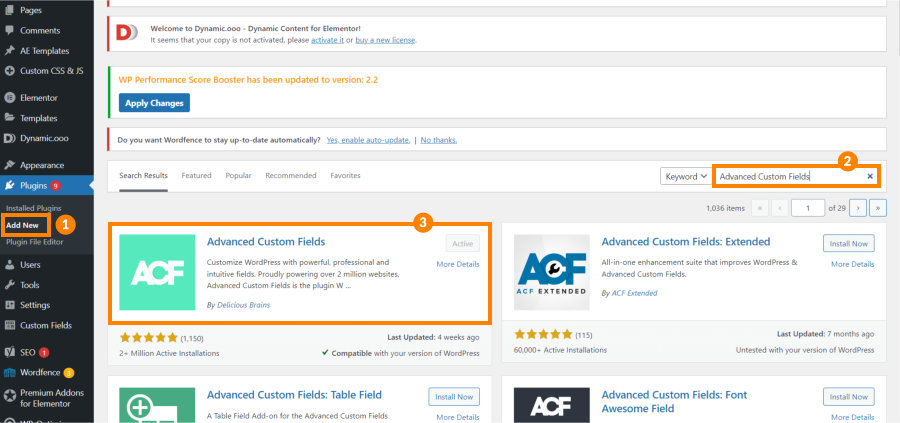
Start by installing and activating the Advanced Custom Fields plugin
From your WordPress dashboard, go to “Plugins” > “Add New” and type “Advanced Custom Fields” in the search box. Then install it and activate the plugin.
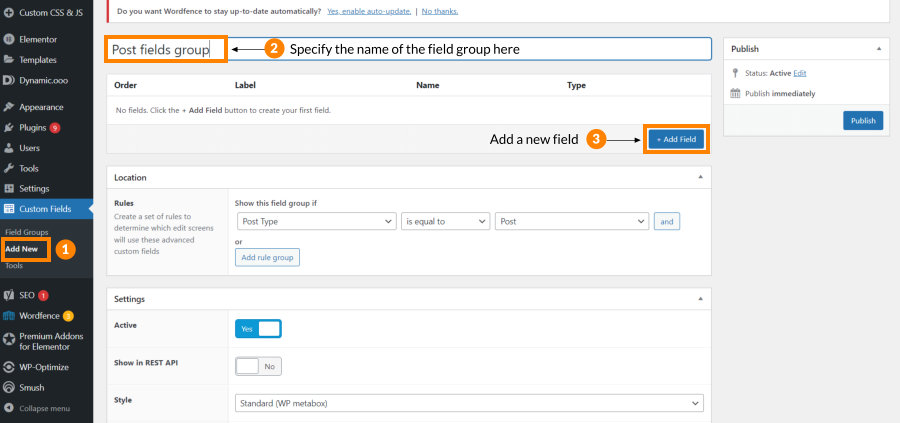
Create a new field group and add a new background color field
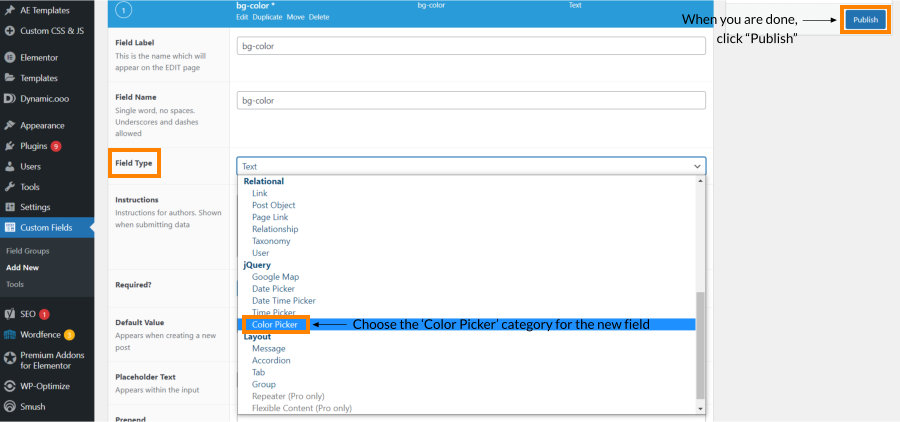
Next, locate the “Custom Fields” in your WordPress dashboard sidebar and add a new field group. Give your group a name and apply conditions (in this case, we are applying this field group to all posts). Then create a new field within this field group. This new field will be our background color field that will have unique value for each post. Make sure to give this field the appropriate category, which is in our case ‘Color picker’ field category.
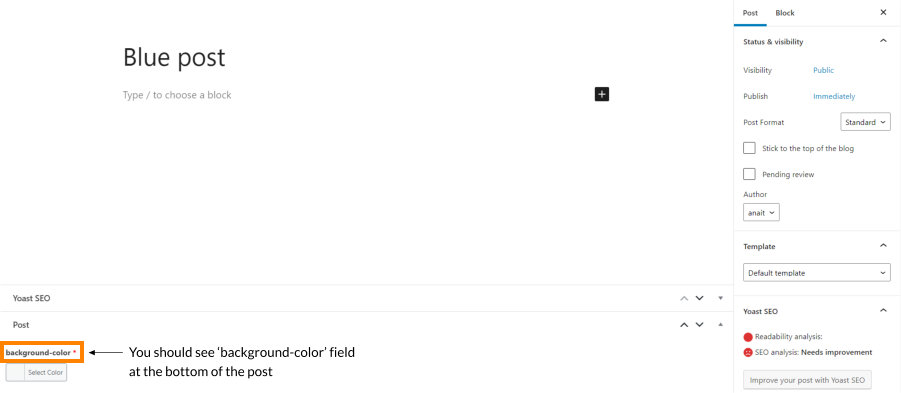
Create some new posts and apply the background color values to each of them
Now head to the “Posts” > “Add New” and create your posts. For the sake of this tutorial, we are creating something like “Blue posts”, “Yellow post” etc. just to show how to achieve this effect. Once you click on “Add New” to create a post, give it a name and scroll down. You should be able to now see the ACF field that you previously created. In our case it is a “background color” field with a color picker.
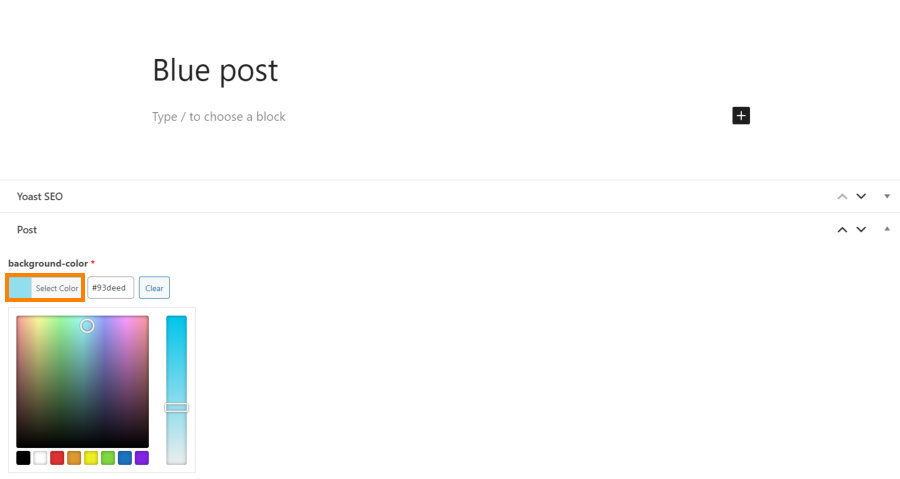
Click on this color picker and select the color or just input a hex code. This will give this post its own individual background color.
You can then proceed to adding some content, like paragraphs of text, a featured image or any other type of post content in WordPress.

Create a Single Post template in your Elementor Pro Theme Builder
When you are done with creating your posts, you can proceed to creating a Single Post template using your Elementor Pro Theme Builder. Your posts will follow the same template and layout, but each of them will have their own unique background color thanks to something called ‘Dynamic Tags’.
*This post may contain affiliate links. If you click on a link and make a purchase, I will receive a commission from the sale, with no extra cost to you. That way you are supporting my blog and allowing me to keep making videos and posts like this. I only promote products that I use, have experience with and support, such as Elementor Pro.
First, go to “Theme Builder” and “Add new Single Post”. We will start with a blank template and I am using “Elementor Canvas” page layout. Once you create a Single Post template, go to “Settings > “General Settings” and select the Page Layout you want. Then head to “Preview Settings” and select “Preview Dynamic Content as Post”. Find the name of the post you created. This will enable you to preview the changes and see what you are doing with the template using one of your posts. That way you can have a better overview of the updates.

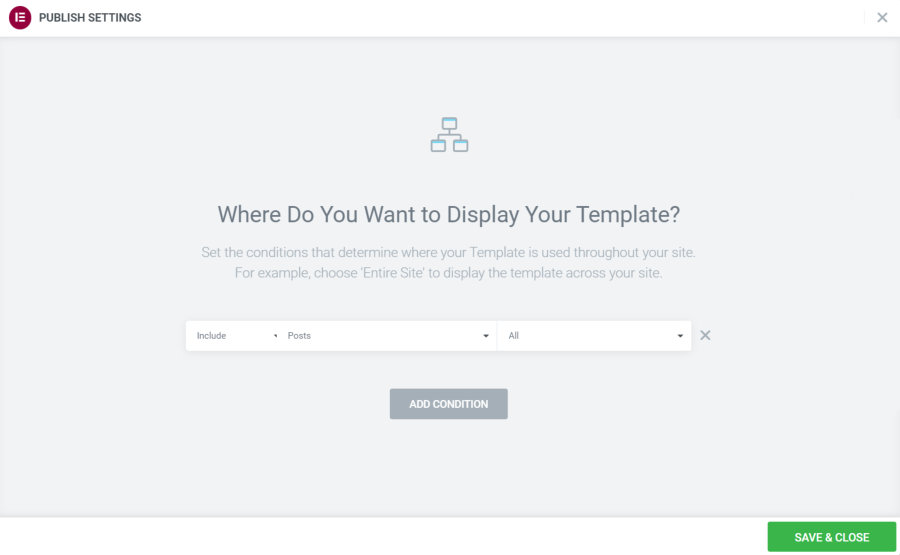
When you are done with these basic post template settings, click on “Publish” and then apply the conditions where you want this template to be used.
Use dynamic tags to apply the background color ACF value to the post section
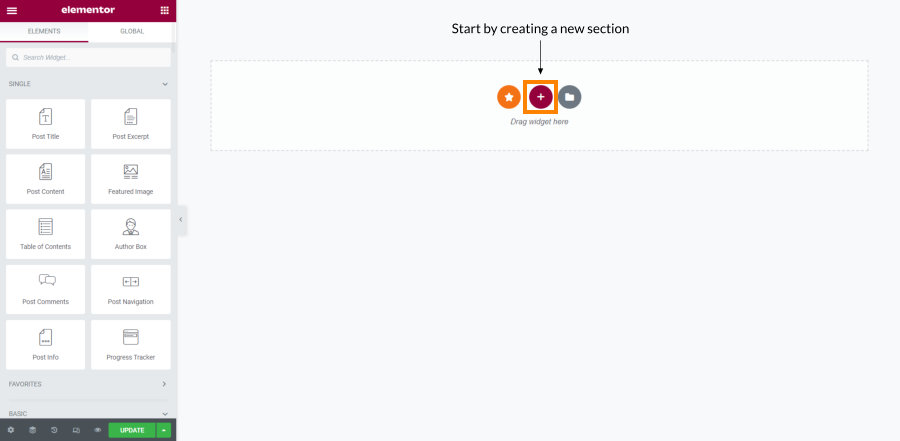
This is the crucial part. Create a new section in your post template and go over to the “Style>Background” tab to style its background.
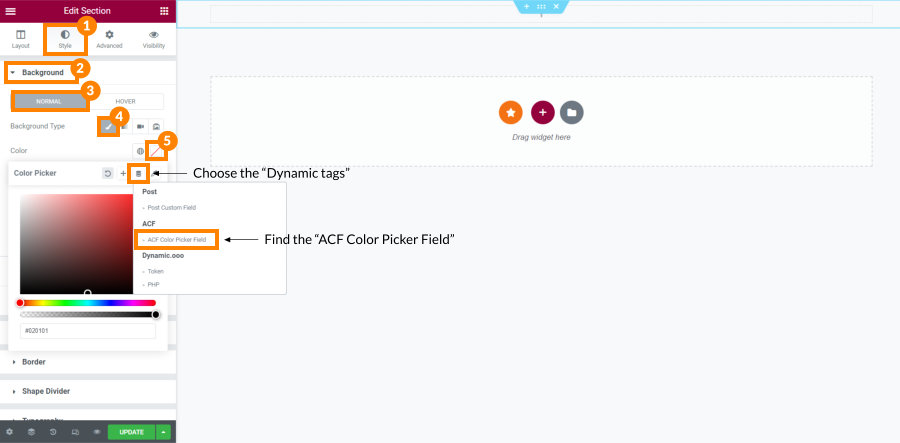
When selecting the color, click on the icon representing the “Dynamic tags” from the screenshot above. Then find the “ACF Color Picker Field”. What this does is that it says to use the value that you specify in this field for each post’s background color.
*This post may contain affiliate links. If you click on a link and make a purchase, I will receive a commission from the sale, with no extra cost to you. That way you are supporting my blog and allowing me to keep making videos and posts like this. I only promote products that I use, have experience with and support, such as Elementor Pro.
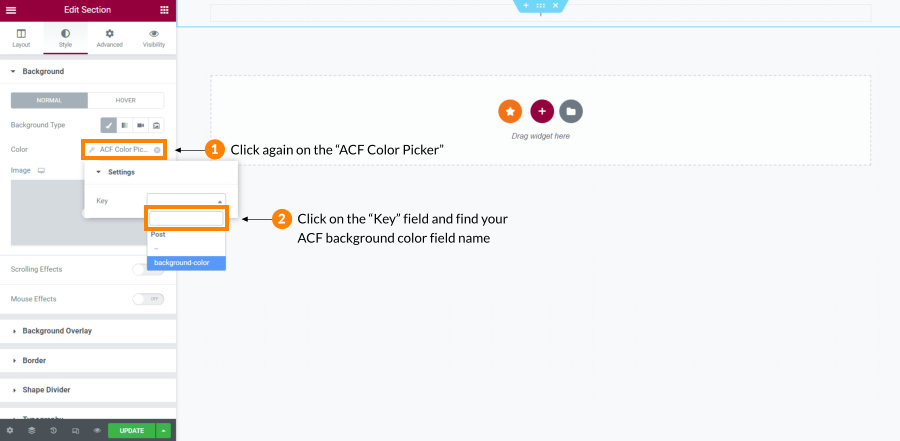
After this, click again on the “ACF Color Picker”, click on “Key” and find your ACF background color field name – in our case it is “background color”.
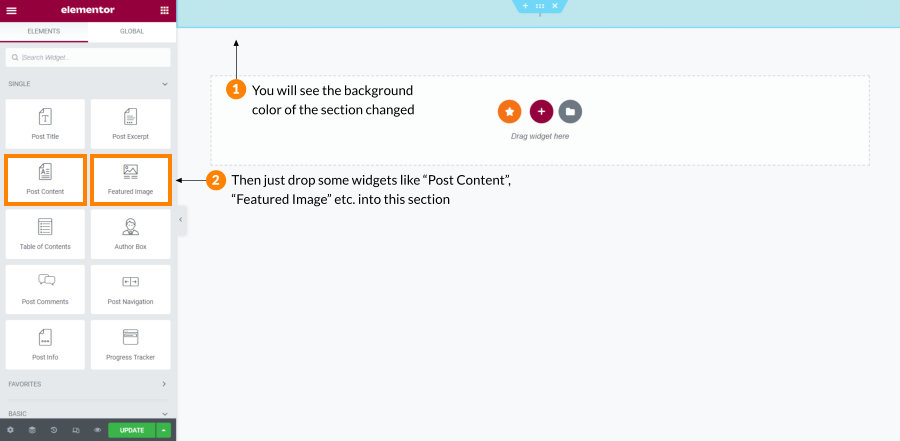
When you are done, you will already see the background color of the post template section changed. Since when we created the template, we used one of our newly created posts to preview our changes. In this case, our “Blue post”, so the background color of this section turned blue.
Next just proceed to customizing your post template and dropping some widgets like “Post Content”, “Featured Image” or any other post widget into this section.
Once you are done, click on “Publish” or “Update” button to save your changes.
And that’s it! Now you created a template and you can go ahead and preview your posts. Each of them will be following the same template and structure but they will have a unique, custom background color value that you assign to each of them. All thanks to Advanced Custom Fields, dynamic tags and theme builder in Elementor Pro.
*This post may contain affiliate links. If you click on a link and make a purchase, I will receive a commission from the sale, with no extra cost to you. That way you are supporting my blog and allowing me to keep making videos and posts like this. I only promote products that I use, have experience with and support, such as Elementor Pro.
*This post may contain affiliate links. If you click on a link and make a purchase, I will receive a commission from the sale, with no extra cost to you. That way you are supporting my blog and allowing me to keep making videos and posts like this. I only promote products that I use, have experience with and support, such as Elementor Pro.