How to open a popup when you click on a text link using Elementor Pro and a bit of CSS?
Check this video on how to create just that or continue reading below!
In this post, we will see how to create a simple popup and then display it when you click on a word or a text link on your page. This tutorial is using Elementor Pro version.
*This post may contain affiliate links. If you click on a link and make a purchase, I will receive a commission from the sale, with no extra cost to you. That way you are supporting my blog and allowing me to keep making videos and posts like this. I only promote products that I use, have experience with and support, such as Elementor Pro.

First, create a Popup template
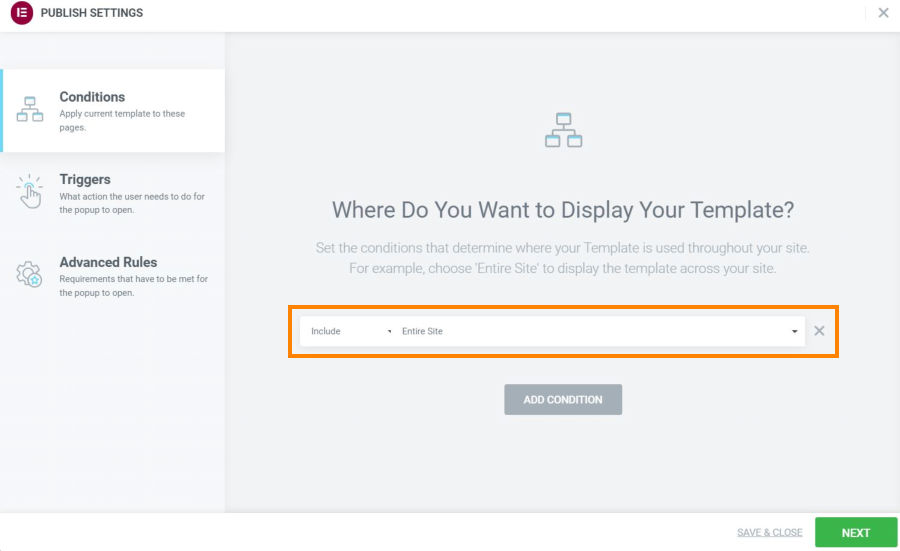
You first need to create a popup by going to Templates > Popups > Add New Popup. After that, give your popup a name, go to ‘Create Template’ and insert widgets, like heading, text or an image to create and style your popup. Hit ‘Publish’ and add a condition ‘Entire Site’ if you wish to display your popup on your whole website. Click on ‘Next’ and ‘Save and Close’.


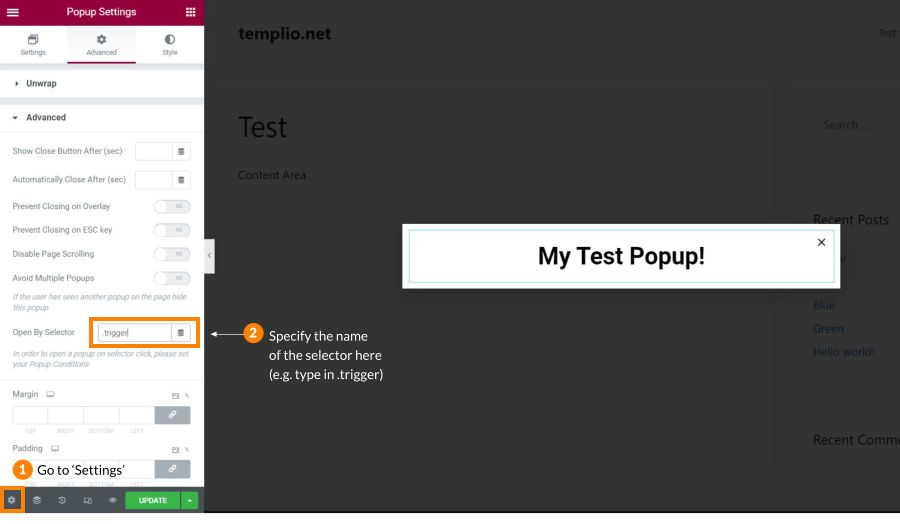
After this, click on the ‘Settings’ in the left sidebar and in the ‘Advanced’ panel, go to ‘Advanced’ and ‘Open by Selector’ field. Make up a name and type it here, for example .trigger. Remember this name that you specify here – you will use it in a bit!
Click on ‘Update’ and go to your page where the text triggering the popup should be. Switch to the ‘Text’ tab of the text widget and insert the code around the word or words that should be used as a popup trigger.
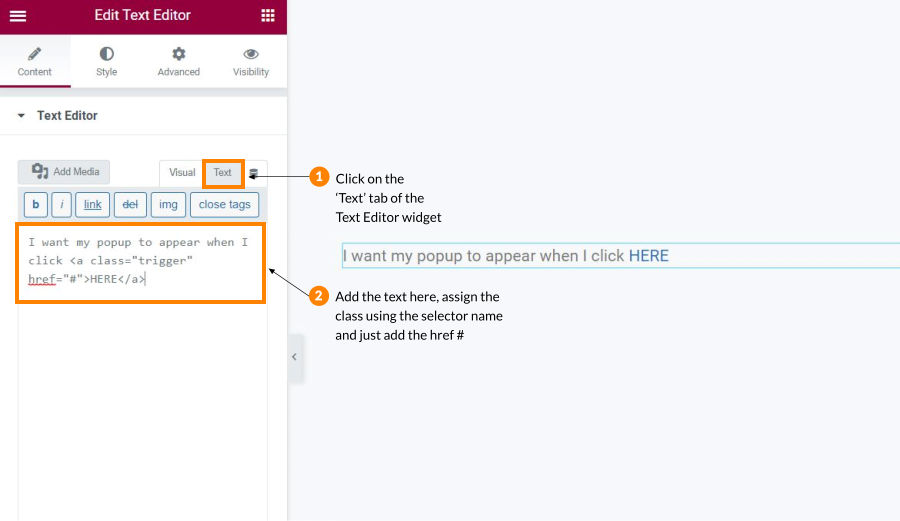
The whole line with the code would look something like this:
I want my popup to appear when I click <a class=”trigger” href=”#”>HERE</a>Click ‘Update’ and there you go! Now you have a link in your text that triggers a popup by calling out a selector that you specified in your popup settings.
*This post may contain affiliate links. If you click on a link and make a purchase, I will receive a commission from the sale, with no extra cost to you. That way you are supporting my blog and allowing me to keep making videos and posts like this. I only promote products that I use, have experience with and support, such as Elementor Pro.
*This post may contain affiliate links. If you click on a link and make a purchase, I will receive a commission from the sale, with no extra cost to you. That way you are supporting my blog and allowing me to keep making videos and posts like this. I only promote products that I use, have experience with and support, such as Elementor Pro.