Would you like to point out certain words and make them bigger than the rest of the text on your website but you don’t know how to do it in Elementor?
Check this video on how to create just that or continue reading below!
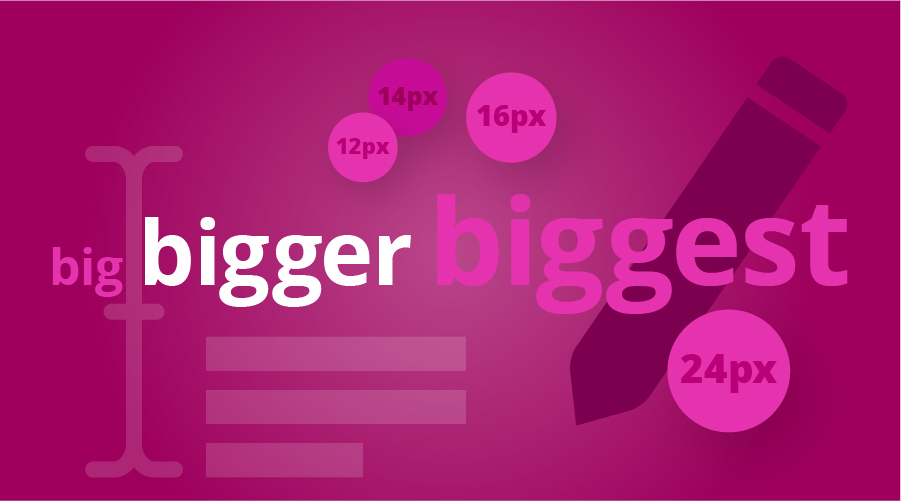
In this post, we will see how to do just that – to create different sizes of text on one line, in a single paragraph using Elementor and CSS. You can now make individual words or letters bigger or smaller than the rest of the text within the same text widget! And not just that, but you can use different styling, color and text-decoration properties as well! The solution isn’t straightforward, but it is extremely easy. It is using so called “span” elements to mark up pieces of text that can be styled differently from the rest of the paragraph. We will be using Elementor builder and just a few lines of code. So, let’s get to it!
*This post may contain affiliate links. If you click on a link and make a purchase, I will receive a commission from the sale, with no extra cost to you. That way you are supporting my blog and allowing me to keep making videos and posts like this. I only promote products that I use, have experience with and support, such as Elementor Pro.
Insert your text as you normally would using Text Editor widget
Drag and drop your text editor widget in Elementor to add some copy. Now, type your text and switch over to the ‘Text’ instead of ‘Visual’ editor in Elementor left sidebar.
IMPORTANT NOTE: If you are using CSS classes to define your text styling, this process will differ just a bit. Let’s first see how it looks like if you are editing the text directly in Elementor page, without defining CSS classes.
If you are not using custom CSS classes and you are styling the text directly in Elementor panel…
If you are not using custom CSS classes to style the text and you just want to make these text changes local, on a single place on your website, then once you’ve switched to ‘Text’ editor, simply decide which part of text you would like to appear in different size (bigger or smaller). Add <span> before it and </span> after it to close it. The ‘span’ marks up part of the text (or simply put, words) that you can then style differently than the rest of the paragraph, while keeping it within the same class and same paragraph. Within the <span> tag, you can then add all the properties you would like this bit of text to have using the “style” callout. You can change its color, font size, styling etc.
So for example, if you would like this text to be red and have 50px size, you can write: <span style=”font-size: 30px; color: red”>
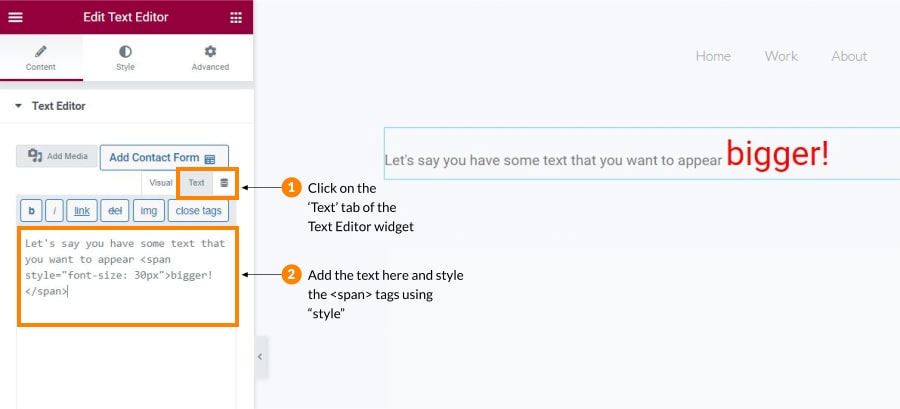
The code for the above example could look like this:
Let's say you have some text that you want to appear <span style="font-size: 30px; color: red">bigger!</span>If you are using custom CSS classes and want to make these text changes unified and global
Now, if you are using custom CSS classes to style your text and you are defining all the properties there, not directly through Elementor editor, the process is just a little bit different, but equally easy and even more practical and efficient! This is especially useful if you are often pointing out words and bits of text on your website and you want all of these to have the same styling that you can change globally from a single place.
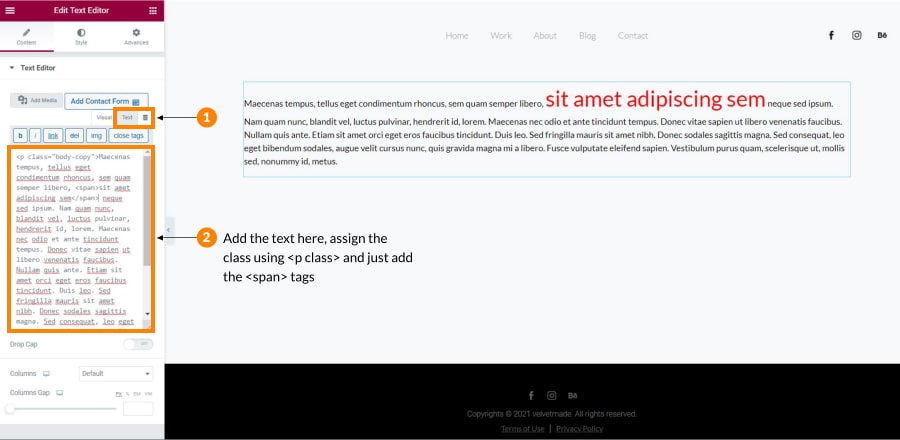
Again, insert the text editor widget and your text. Switch to ‘Text’ editor instead of ‘Visual’ in Elementor left sidebar. After this, you need to apply the class to your paragraph in this editor, so just type in <p class=”name-of-your-class”> before the paragraph and start typing. You can then simply use the <span> before the text part you would like to change and </span> after it without actually needing to define any styling here in this text editor.
Therefore, in Elementor editor you can write something like this:
<p class="body-copy">This is your text. And <span>this part</span> should appear bigger.After adding the ‘span’ tags, just go back to your CSS editor (for example, using the Simple Custom CSS and JS plugin) and in your class definition, use the ‘span’ to call out and style these bits of text globally from one place! So within your code, you would now write “.name-of-your-class span” to start applying the changes to these pointed out words – color, sizing – you name it.
In your custom CSS, you can then style the “span” elements separately while keeping the rest of the properties of the class “body-copy” that they are assigned to:
.body-copy span{
   color: red;
   font-size: 30px;
}
Now you can simply add the ‘span’ tag on multiple places in your text with that class throughout the whole website and you can easily change those properties from a single place in your CSS editor!
*This post may contain affiliate links. If you click on a link and make a purchase, I will receive a commission from the sale, with no extra cost to you. That way you are supporting my blog and allowing me to keep making videos and posts like this. I only promote products that I use, have experience with and support, such as Elementor Pro.
*This post may contain affiliate links. If you click on a link and make a purchase, I will receive a commission from the sale, with no extra cost to you. That way you are supporting my blog and allowing me to keep making videos and posts like this. I only promote products that I use, have experience with and support, such as Elementor Pro.